(This post has been highly enhanced with JavaScript interaction that is likely lost if you're reading this in a news aggregator; visit the original post on my site for the proper experience.)
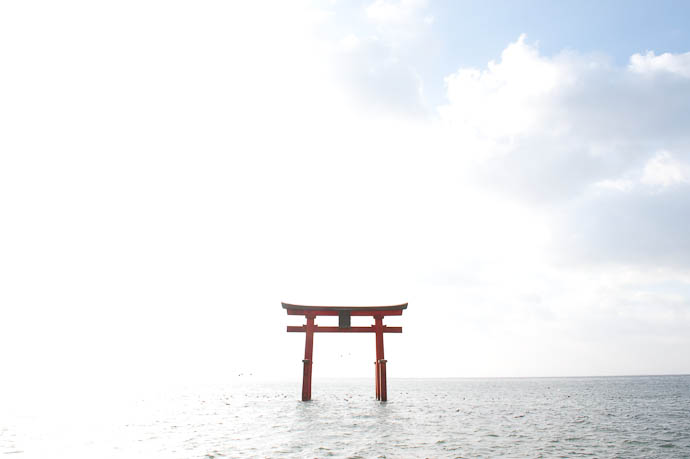
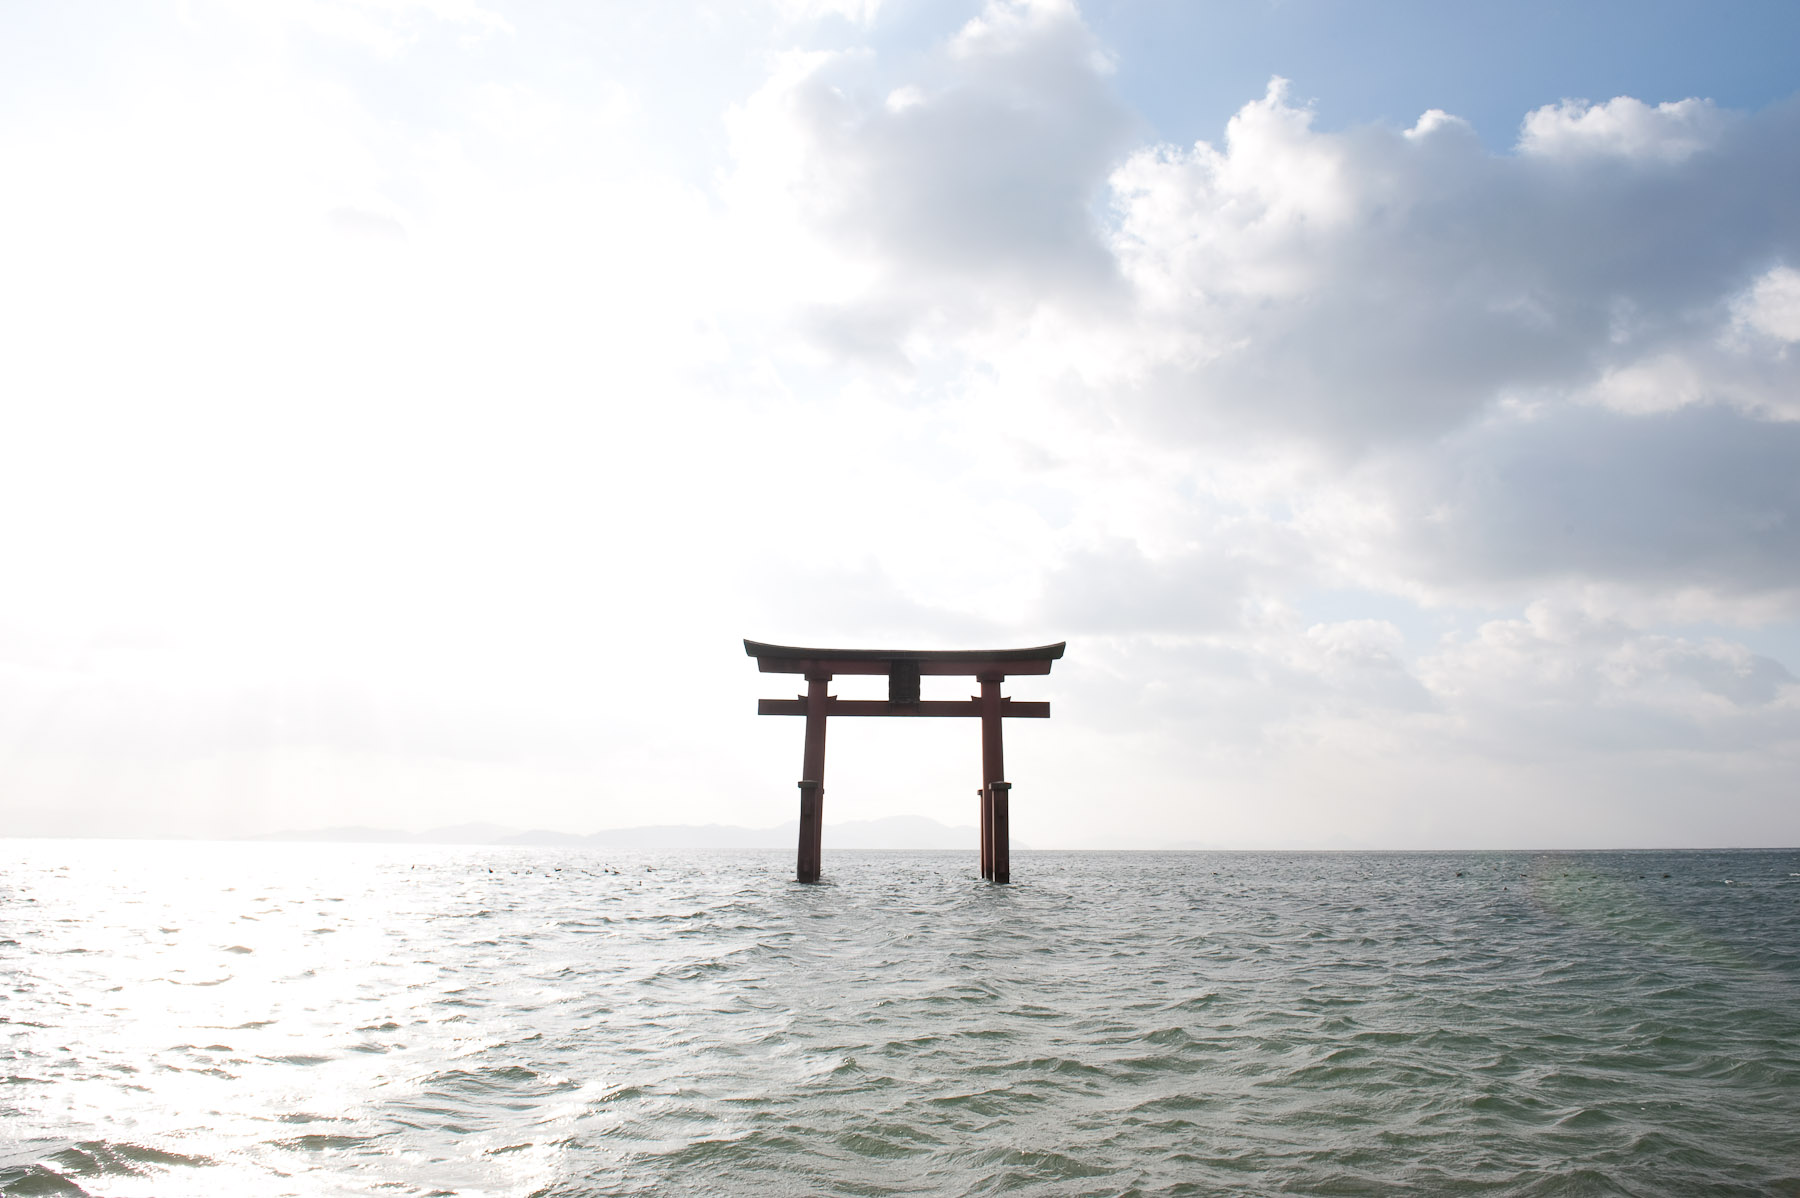
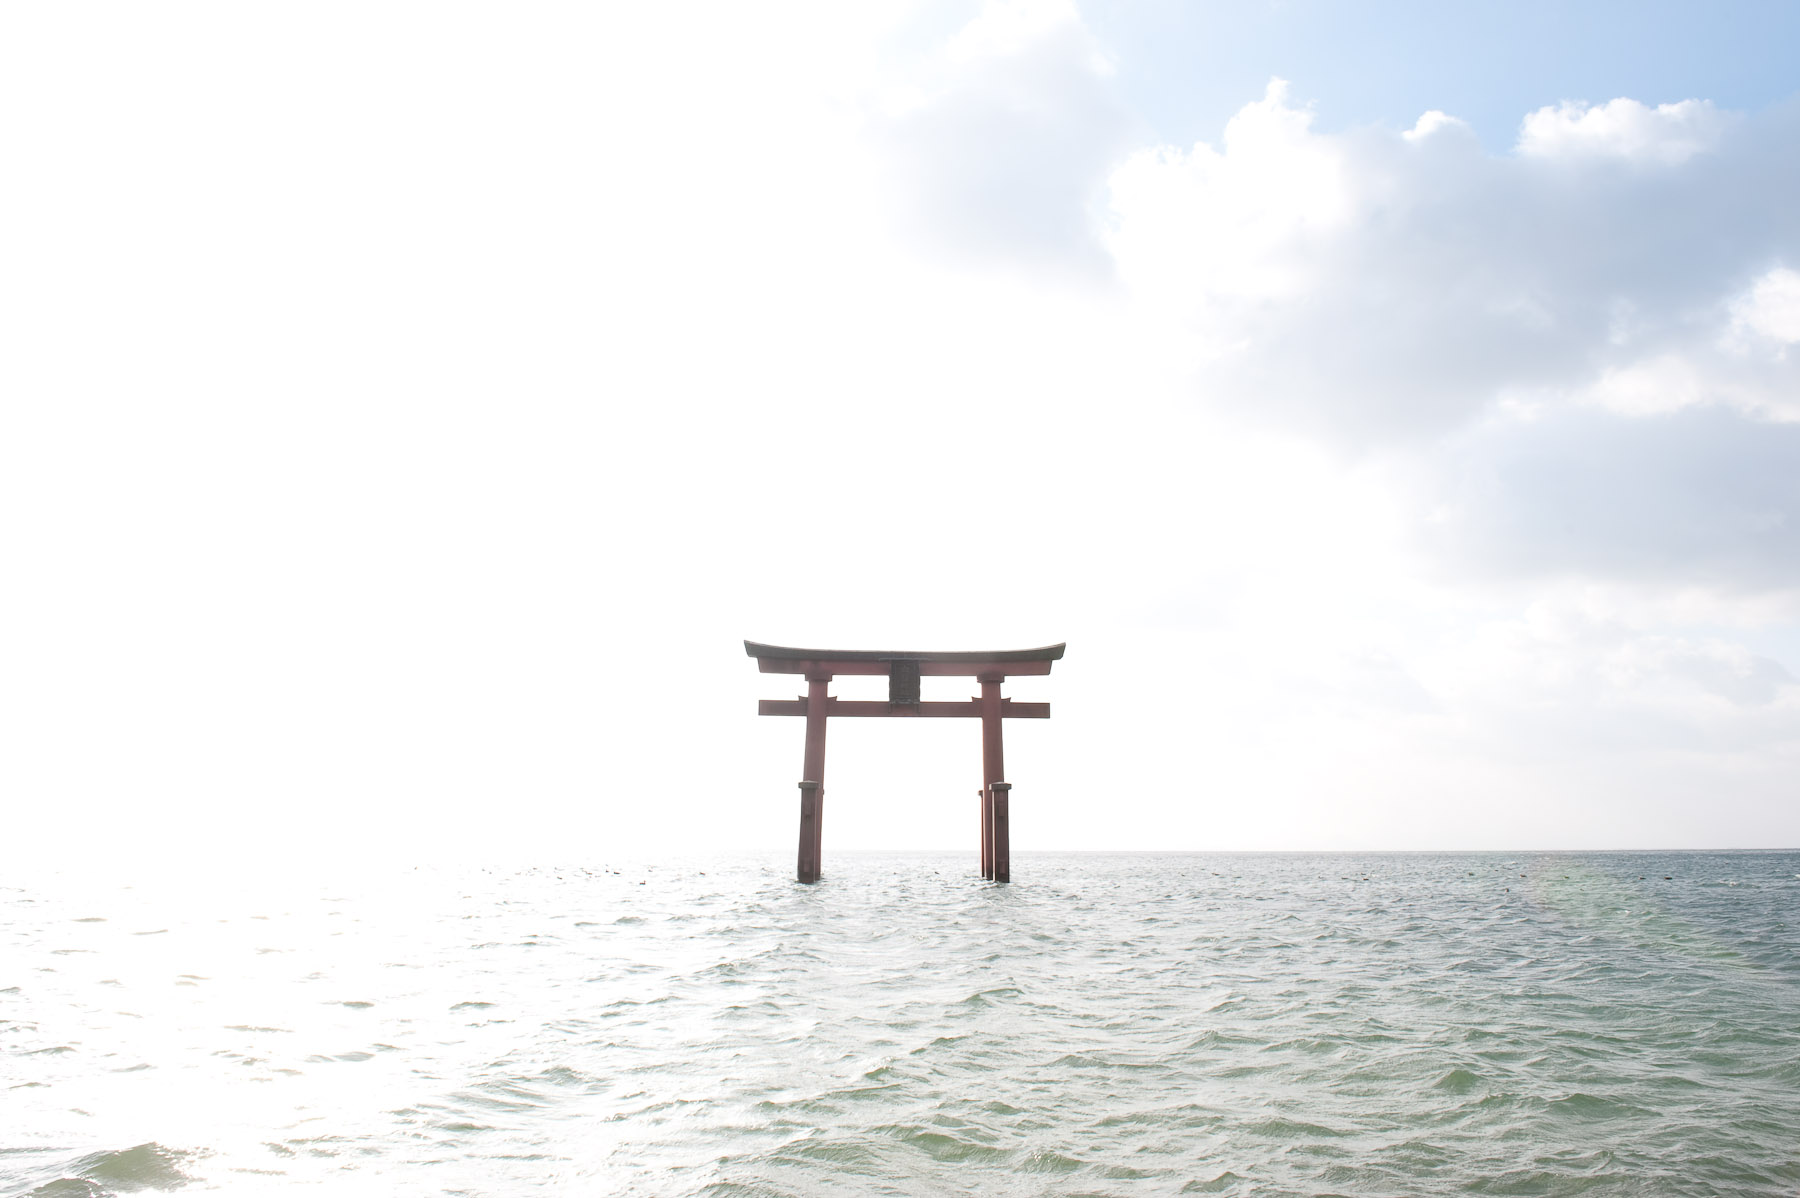
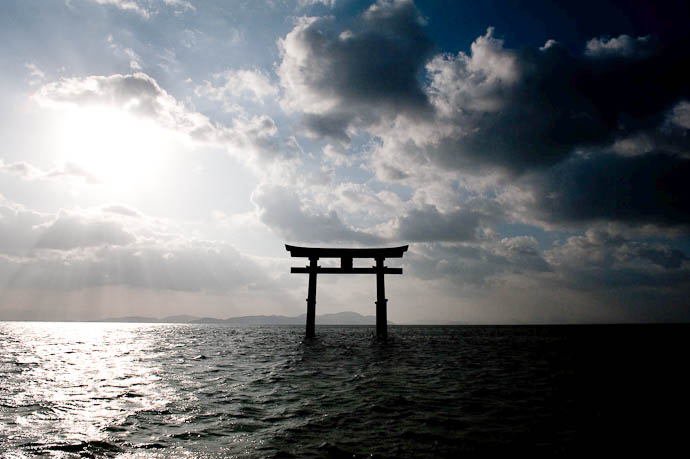
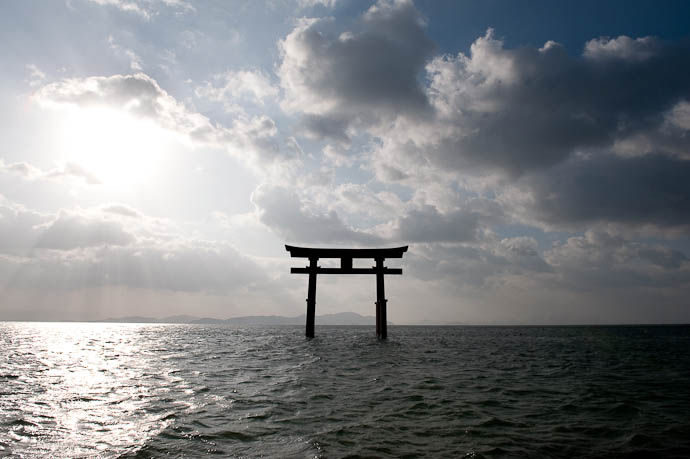
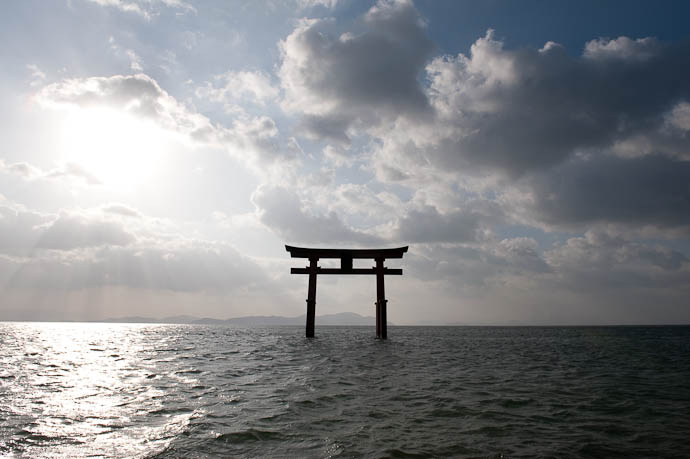
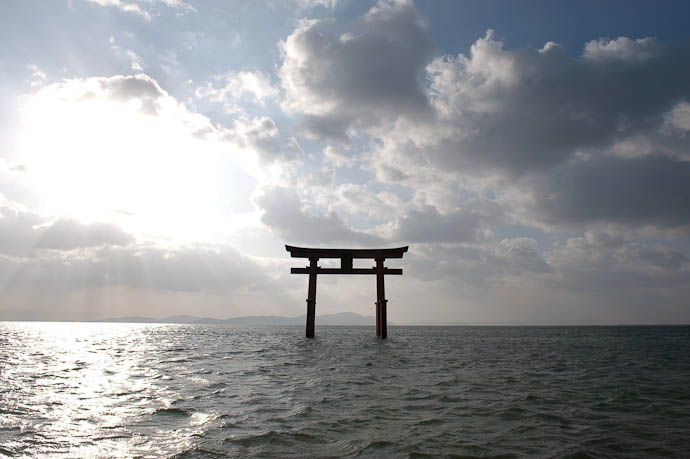
On my way to see Anthony's first ski experience earlier in the month, I stopped by the Shirohige Shrine on the waters of Lake Biwa, in Takashima Japan, to take a few pictures. I posted a “washed out” picture of the shrine's main gate in the middle of the water that I'll repeat here:
1/160 sec, f/11, ISO 250 — map & image data — nearby photos
Main Gate of the Shirohige Shrine
( repeated from an earlier post )
I really like the washed-out effect in this shot, even though it's the exact opposite of what I generally try to get. I usually try to get the sunburst streaming in, like in these shots from my blog archive: Kouri Island (Okinawa) and Midwest America (Ohio) and Shogunzuka (Kyoto).
I'd like to say that the effect seen in this washed-out shot was one that I crafted using skill, experience, and natural talent, but it was due to none of those. Rather, it's the result of taking a high-speed burst of “bracketed” exposures, just to see what would happen.
I told the camera to capture as quickly as it could a wide breadth of exposures from way overexposed to way underexposed, and in less than 1.5 seconds, it took 8 shots: the most overexposed one allows more than 120× the light of the most underexposed one.
Along the same lines as the interactive Spot Metering Basics post from earlier in the month, here's an interactive way to visualize the over- and underexposing of an image: mouse over the green buttons to see different exposures of the same scene...

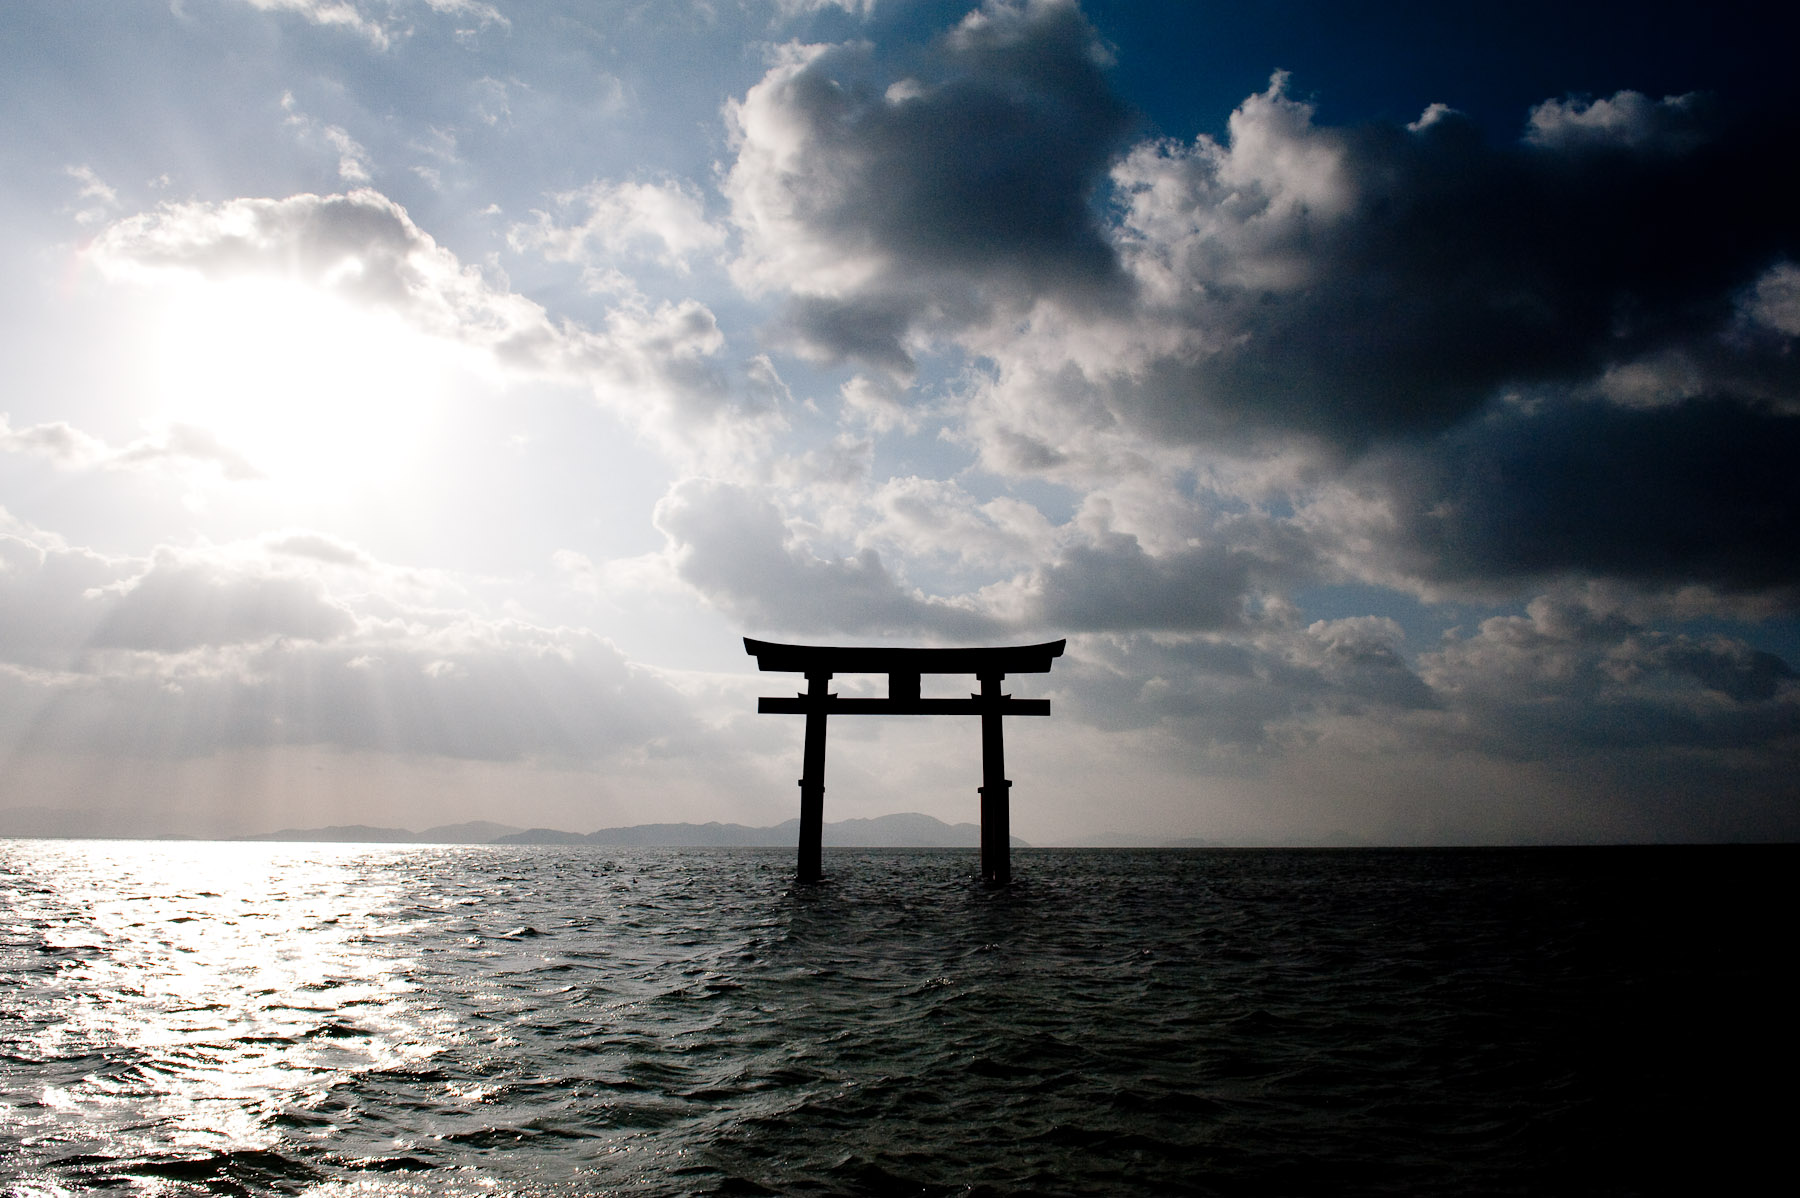


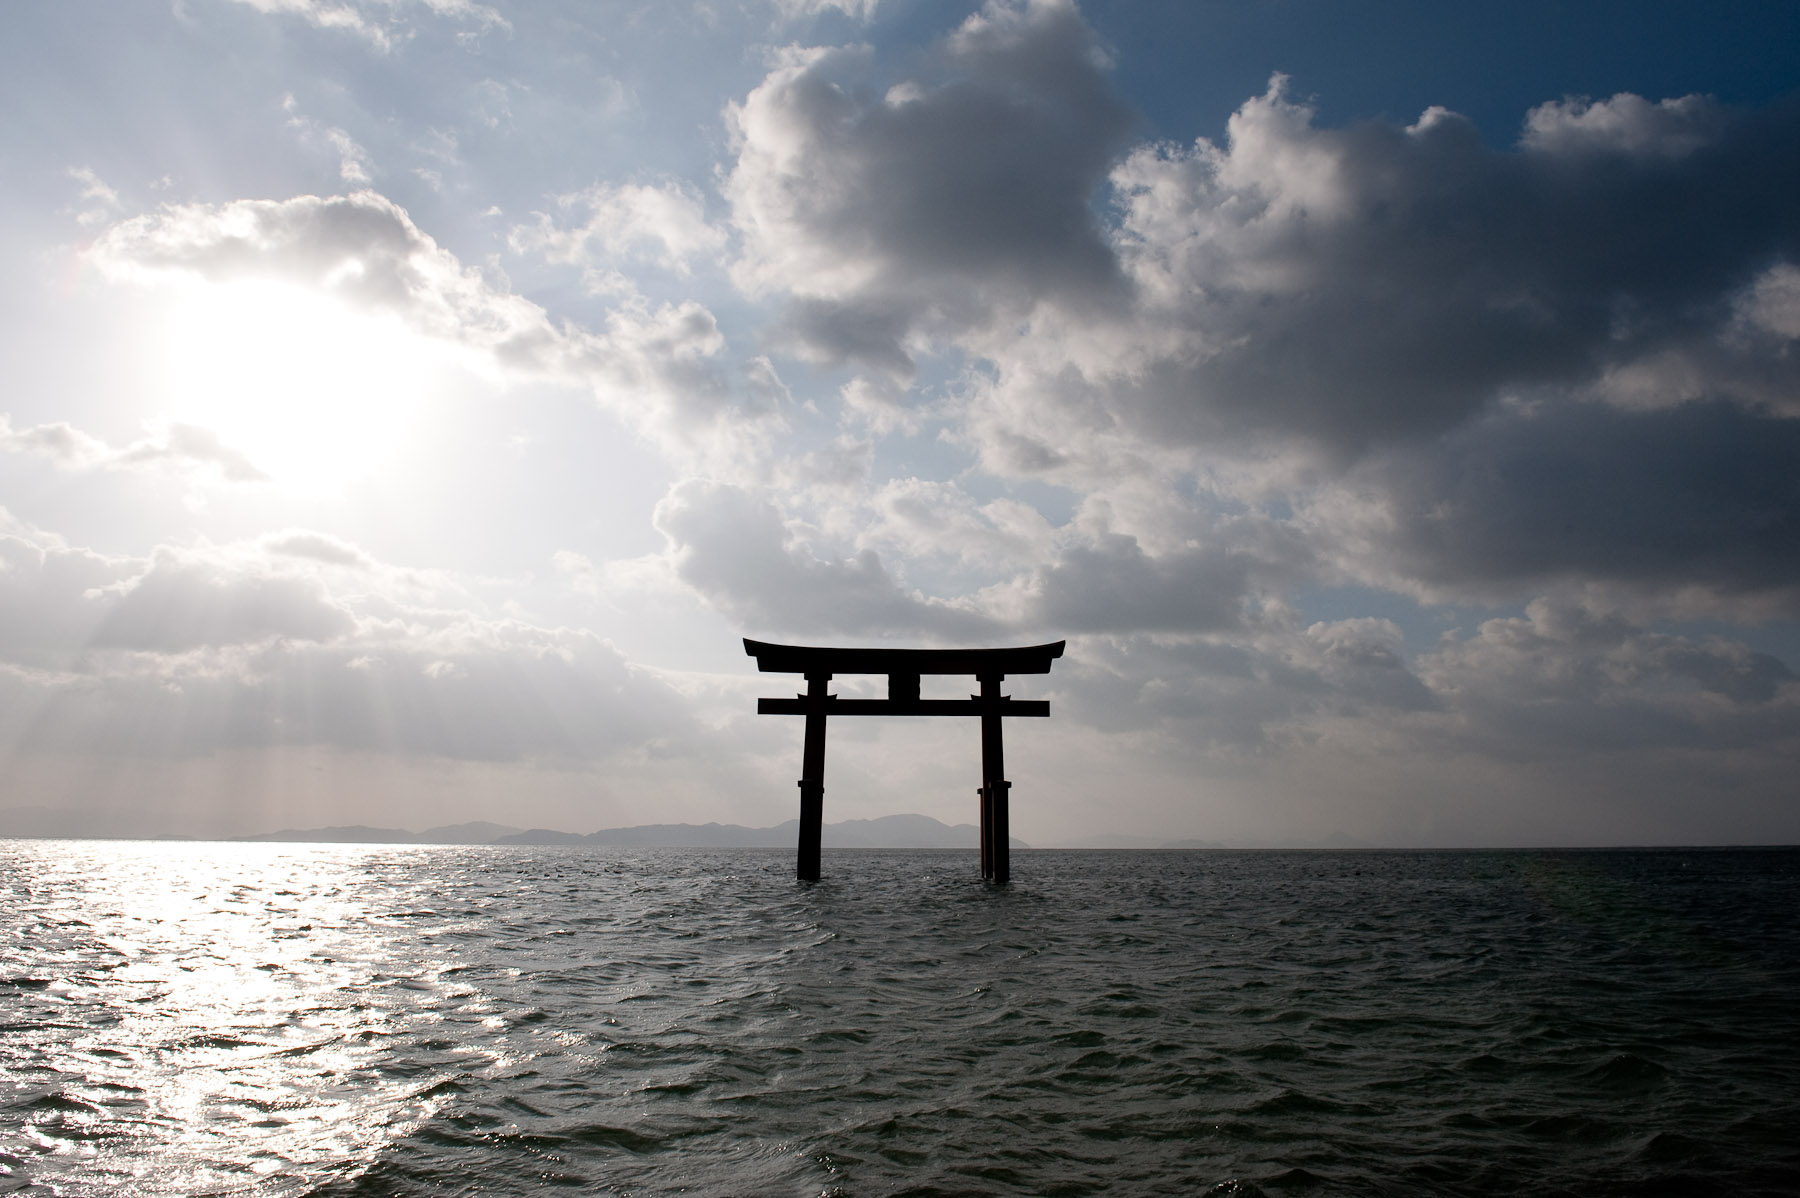
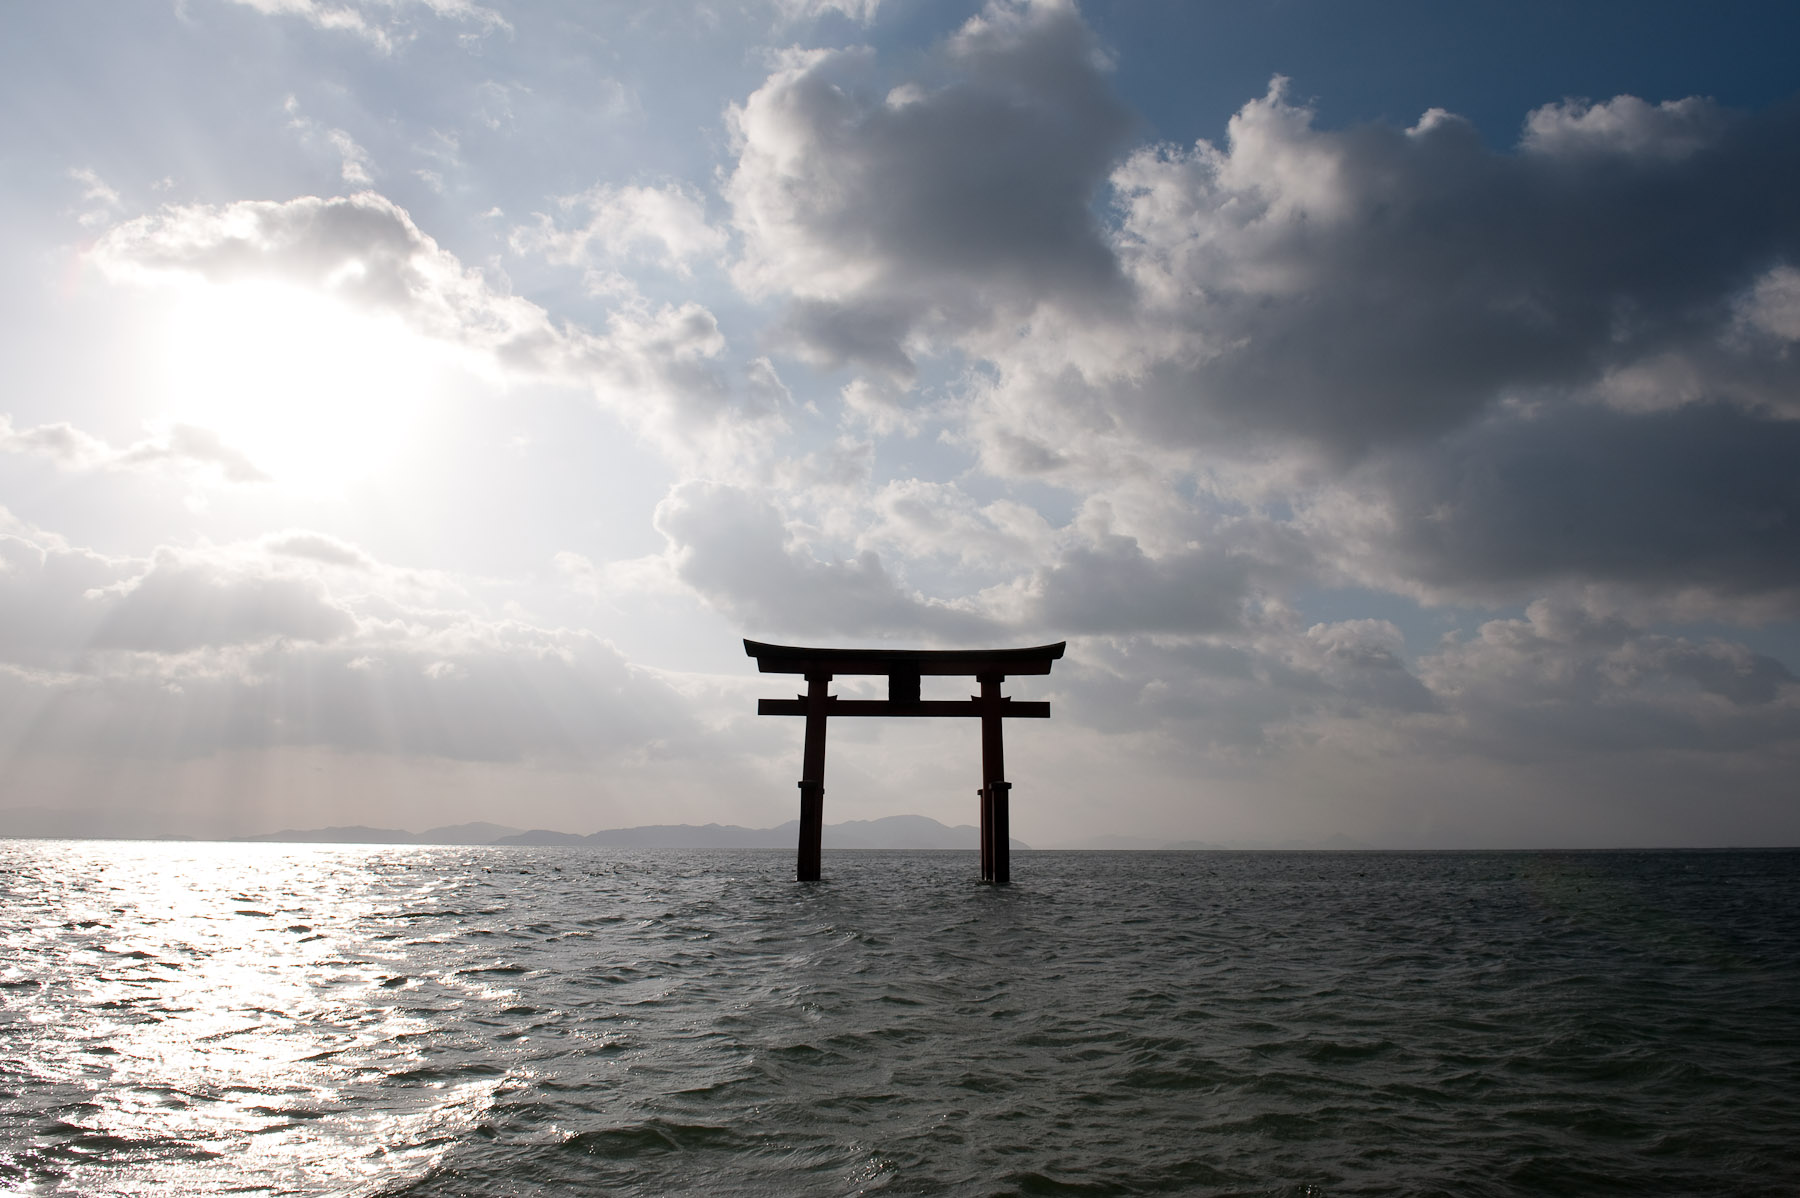


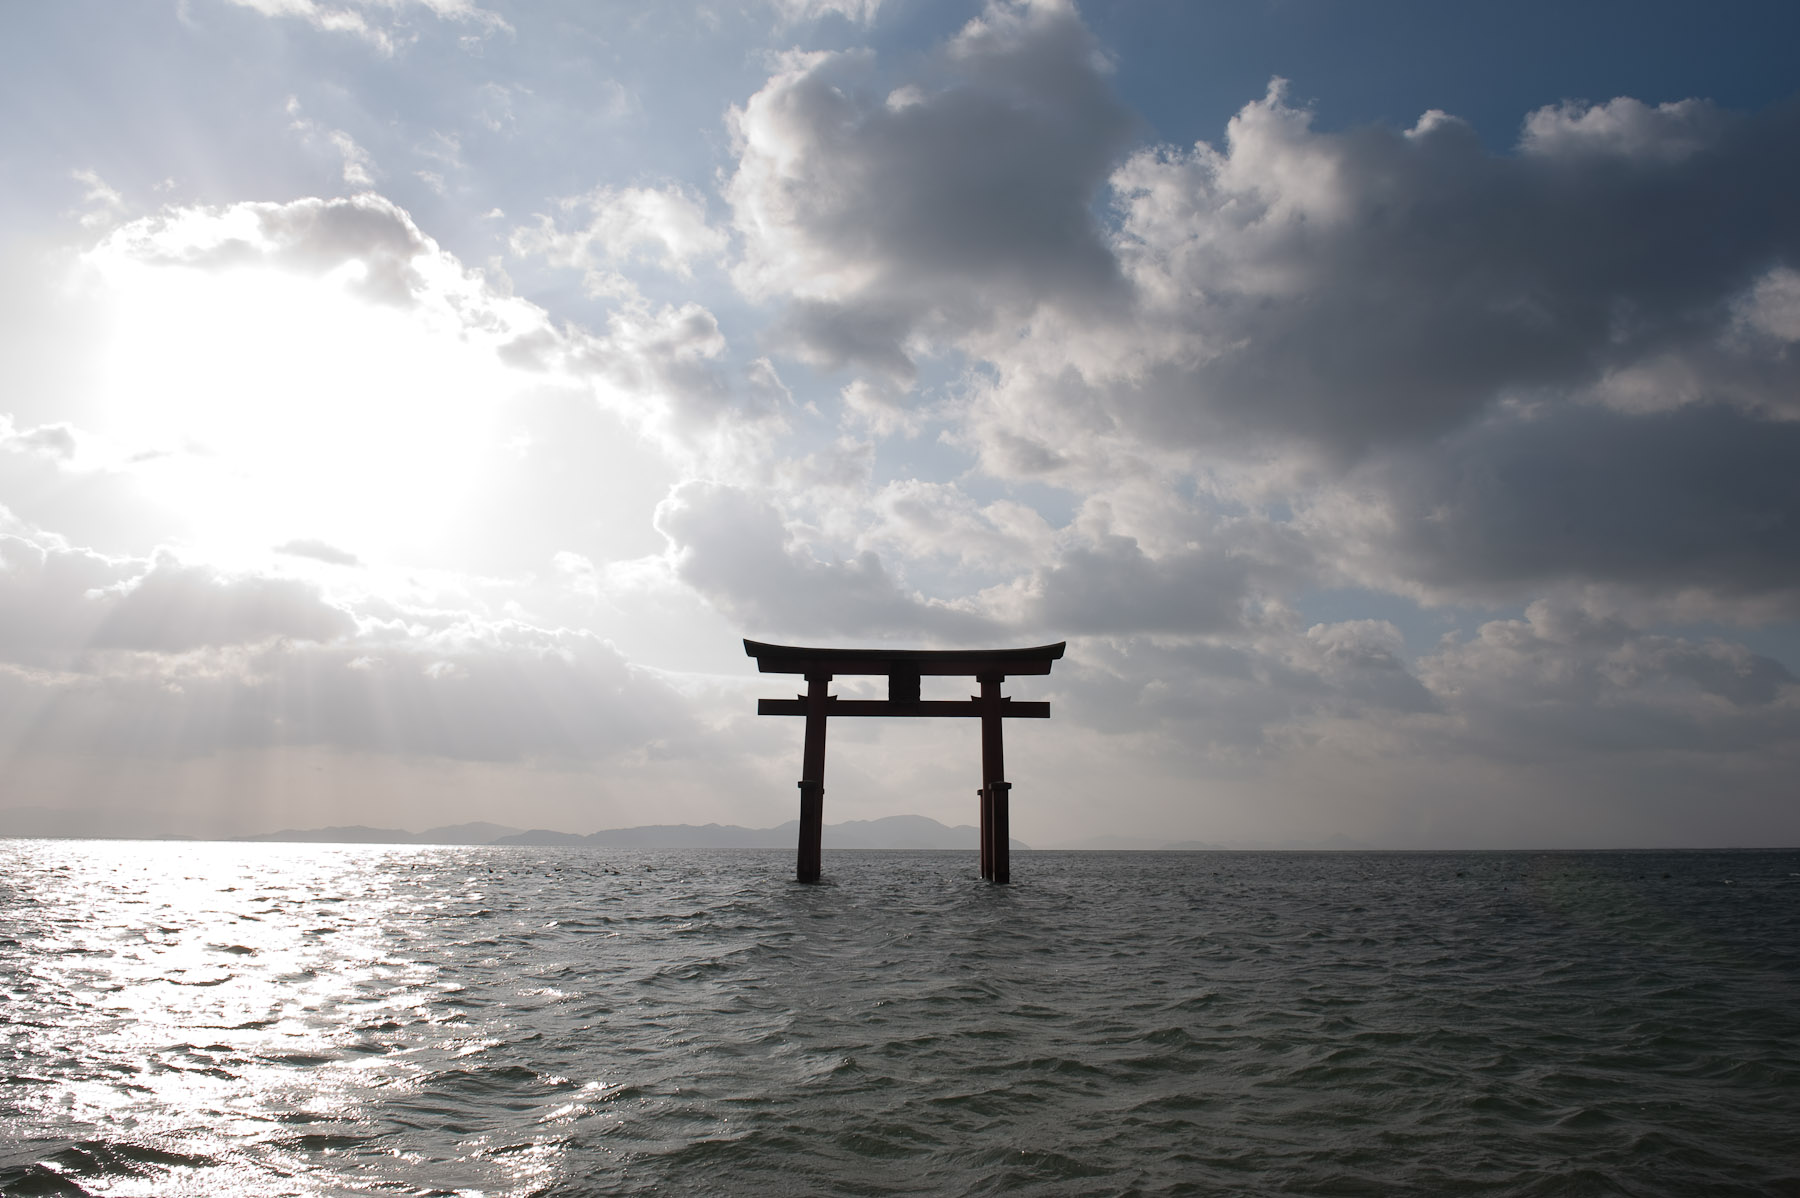
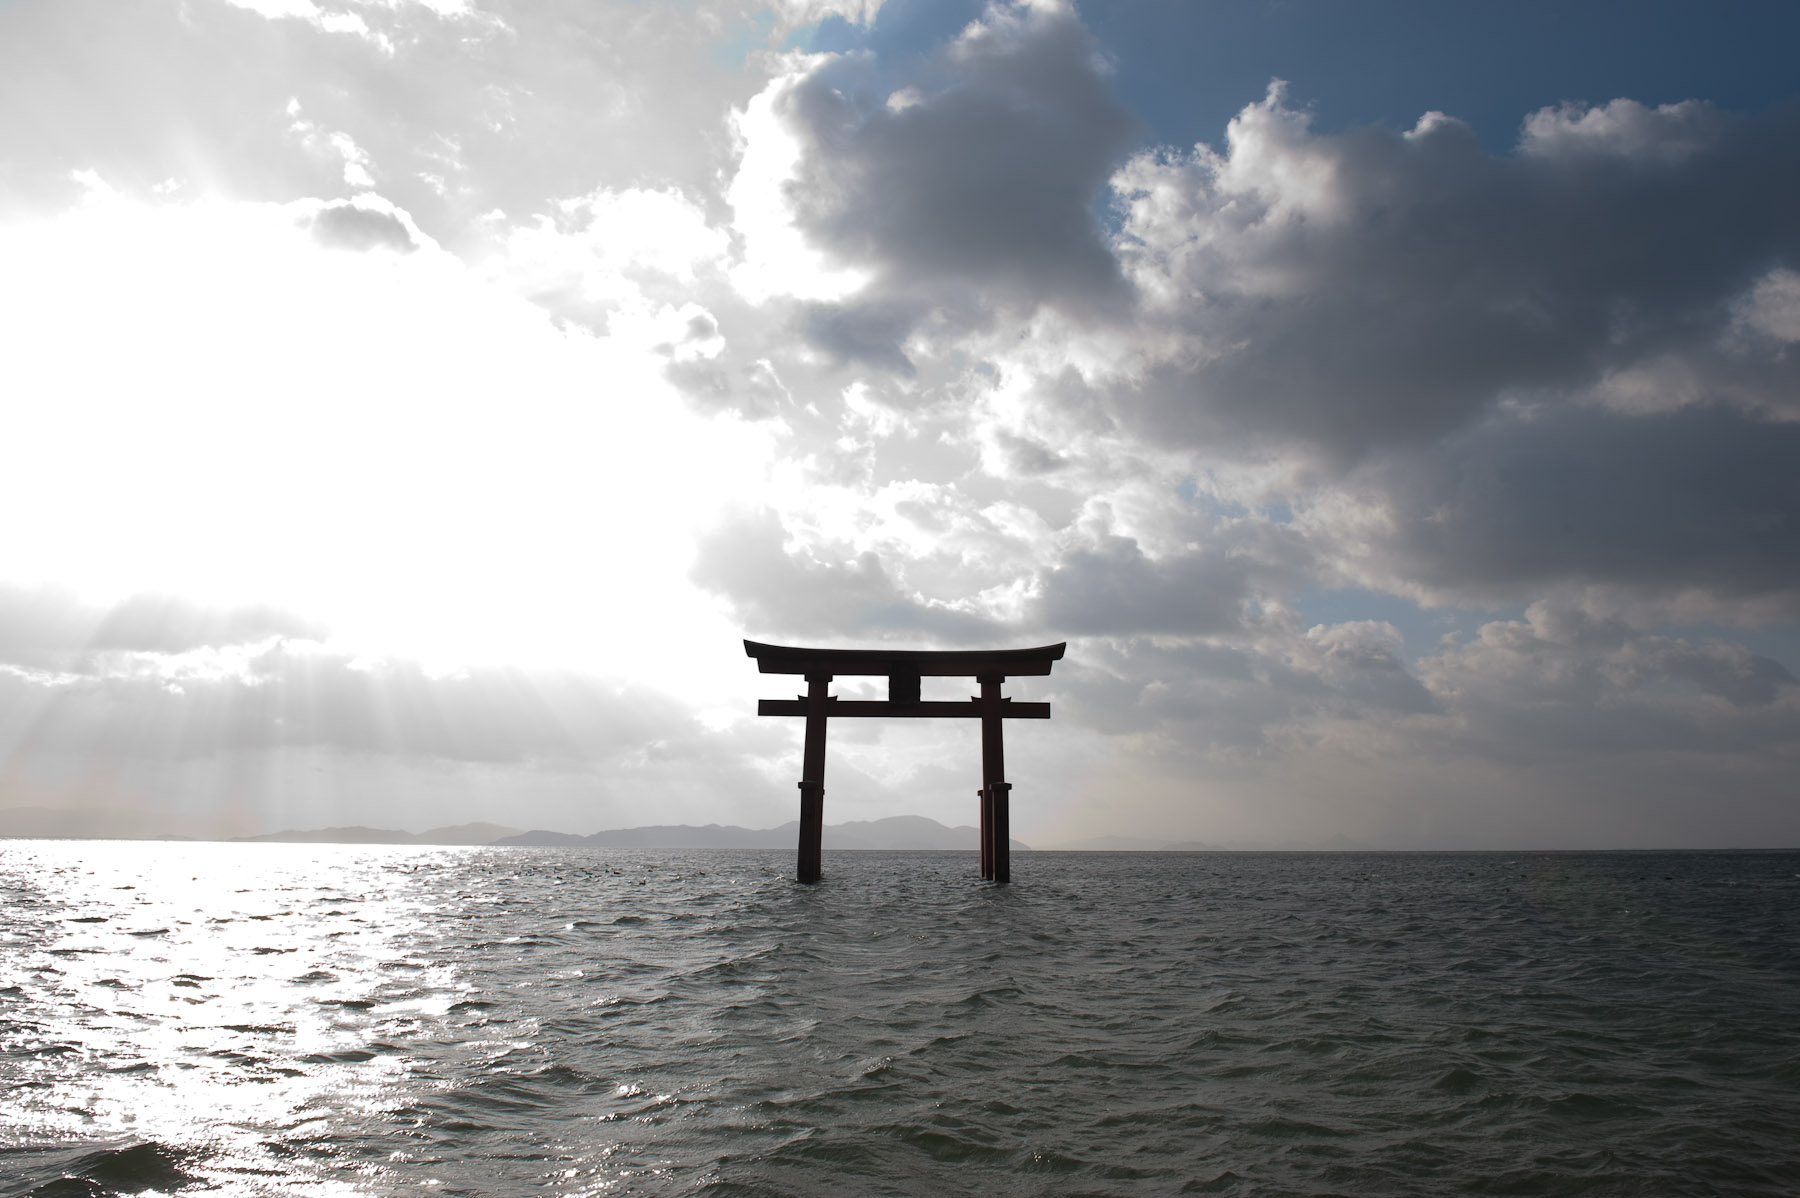


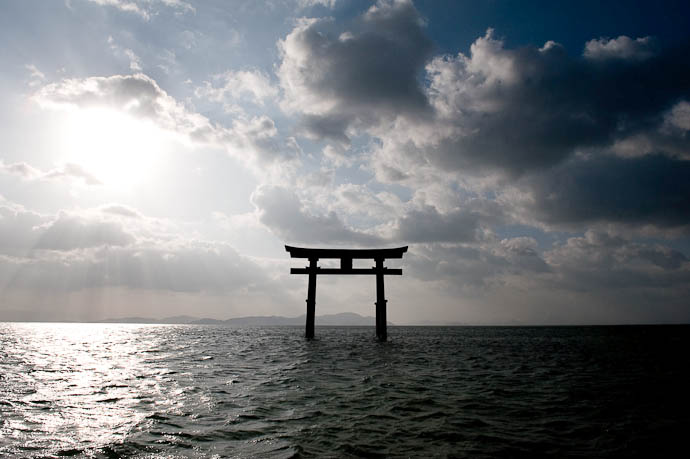
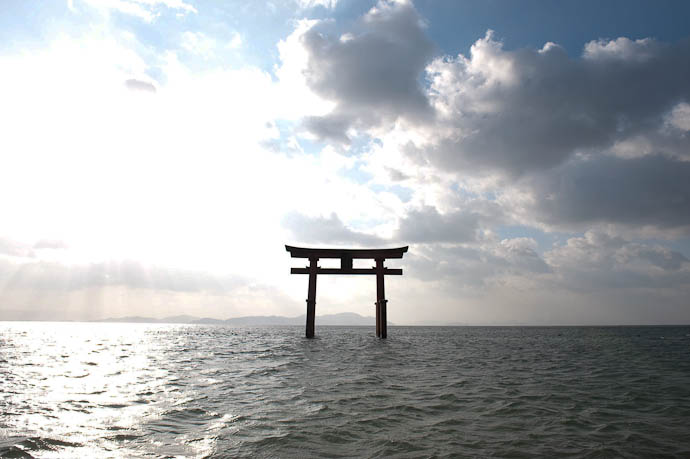
| -3 EV | -2 EV | -1 EV | base | +1 EV | +2 EV | +3 EV | +4 EV |
The center photo marked “base” has the exposure that the camera deemed proper at the time. Each one to the right (+1 EV, +2 EV, etc) is overexposed by double with each step, so the “+4 EV” photo allowed 16× the light as the base photo. Conversely, each one to the left (-1 EV, -2 EV, -3 EV) allowed half the light.
(“EV” means “exposure value”, and refers to how much light takes part in the making of the image. The term has an entry in Wikipedia)
Let's get more interactive...
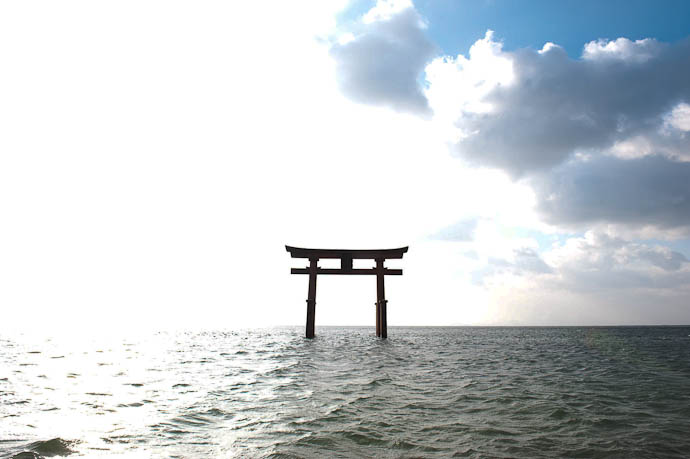
One reason I shoot in raw format instead of jpeg is the latitude it affords in recovering from exposure disasters. It's somewhat academic, but I wondered how each of the non-base shots would look if I tried to correct each “wrong” exposure after the fact, in Lightroom.
If each raw image had perfect data, I could correct the underexposure or overexposure to arrive back at the base image, but since there is necessarily a limit on how much detail an image can hold, we would expect to lower quality in the results, and indeed that's the case. Click this button to enable another row of controls under the photo above....
Upon clicking the button, a yellow set of controls appears under the photo, which bring up copies of the photos that have been normalized to the base exposure. Again, if raw files had infinite detail, all the images in the yellow row would be identical to the green “base” image. (The yellow “base” image is the same as the green one; they're the same photo.)
For the severely-overexposed “+4 EV” green original, this attempt at correction during post-processing means attempting to reduce the exposure by four stops, but as the yellow “+4 EV” image shows, the result is pretty bad. (Toggle back and forth between the yellow “+4 EV” and the base photo to see what detail could not be recovered, even from the raw file.)
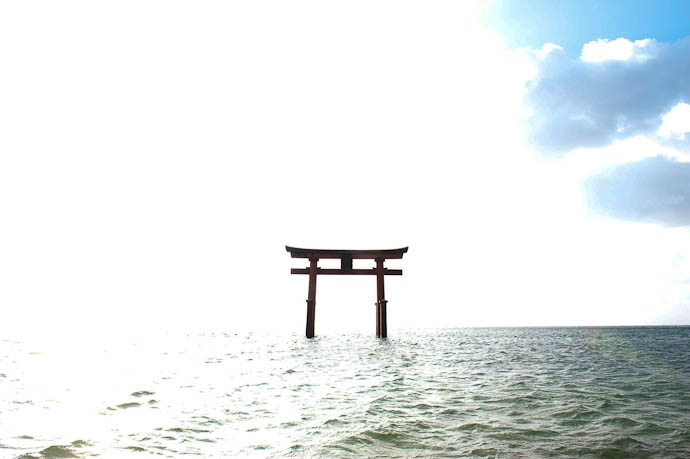
Still, when limited to +/- 2EV or even +/- 3EV, the results one can get from the raw files are not too bad... certainly, better than nothing, in a pinch. But what if I had shot in jpeg instead? How much could I have recovered from a wrong exposure then? Let's look...
Clicking on this button enables a third set of controls under the photo, blue ones which attempt to normalize jpeg versions toward the “base” exposure, just as the yellow buttons attempt to normalize raw versions. Again, the “base” photo is identical in all three rows.
Here, it's interesting to compare between the yellow and the blue rows. The lack of difference between the yellow “-3 EV” and the blue “-3 EV” tells me that the jpeg holds details in the shadows very well, and so when those shadows are boosted to compensate for the underexposure, the result is pretty good. It's very comparable to the raw version.
Highlights are another story, as there's notable degradation even in the blue “+1 EV” version, and it only gets worse further right.
Fun stuff.
A month ago I posed “Pushing Lowlight-Photography Limits: The Atta Terrace Hotel at Night,” evening shots from the hotel we stayed in during a short trip to Okinawa during the New Years break. Today, I thought I'd post some day shots as well.
The hotel, The Atta Terrace Club Towers, does not allow children (at least not in the common areas), and it's sort of out of the way, so it's quite peaceful.

Nikon D700 + Nikkor 24-70mm f/2.8 @ 52 mm — 1/400 sec, f/3.2, ISO 200 — map & image data — nearby photos
Reception / Lobby
desks and chairs; no counters

Nikon D700 + Nikkor 24-70mm f/2.8 @ 24 mm — 1/125 sec, f/6.3, ISO 1800 — map & image data — nearby photos
View from the Lobby
hotel rooms are in the towers in the background

Nikon D700 + Nikkor 24-70mm f/2.8 @ 70 mm — 1/125 sec, f/3.5, ISO 640 — map & image data — nearby photos
Reverse View
restaurant on the lower floor, lobby/reception on the upper
 -- Okinawa, Japan -- Copyright 2009 Jeffrey Friedl, https://regex.info/blog/")
Nikon D700 + Nikkor 24-70mm f/2.8 @ 44 mm — 1/125 sec, f/3.5, ISO 640 — map & image data — nearby photos
Towers and “Library”
the “Library” being a section of the bar/lounge with a small bookshelf
( the middle three pictures of Japanese Attention to Presentation were taken there )

Nikon D700 + Nikkor 24-70mm f/2.8 @ 24 mm — 1/125 sec, f/6.3, ISO 2500 — map & image data — nearby photos
Heading Down to the Towers

Nikon D700 + Nikkor 24-70mm f/2.8 @ 31 mm — 1/125 sec, f/5, ISO 5000 — map & image data — nearby photos
Tower Lobby
quiet, understated elegance

Nikon D700 + Nikkor 24-70mm f/2.8 @ 24 mm — 1/125 sec, f/8, ISO 6400 — map & image data — nearby photos
Our Room
1701

Nikon D700 + Nikkor 24-70mm f/2.8 @ 52 mm — 1/125 sec, f/6.3, ISO 500 — map & image data — nearby photos
First Instinct
is to check the view
Turning around from where Fumie is standing in the picture above, yields the view in the picture below, with the big bath and picture window visible across in the other room...

Nikon D700 + Nikkor 24-70mm f/2.8 @ 24 mm — 1/125 sec, f/8, ISO 4500 — map & image data — nearby photos
Reverse View
The room with the bath also has a glass-enclosed shower, two vanities (one on either side of the door), two closets, and a separate room for a toilet.

Nikon D700 + Nikkor 24-70mm f/2.8 @ 24 mm — 1/125 sec, f/4, ISO 1800 — map & image data — nearby photos
Passion Fruit · Orange · Kiwifruit
The room is not nearly as luxurious as the “Deluxe Executive Suit” at the Four Seasons in Whistler, BC, Canada that we got to stay in during the summer, but that's like saying a big lump of gold is not as nice as a bigger lump of gold. The Four Seasons was not gaudy at all, but the Atta Terrace is even more understated, which makes it (to me) even more elegant and pleasant. Compare, for example, the lobby seen in the first picture with the lobby of the Four Seasons. Both are wonderful, of course, and both are well suited to their respective climates.
The windows of our room that faced the rest of the hotel complex did not open, but the windows of the elevator lobby just outside the room did, so here are the views looking that way, day and night...

Nikon D700 + Nikkor 24-70mm f/2.8 @ 48 mm — 1/1600 sec, f/4, ISO 200 — map & image data — nearby photos
Day
pool is behind the trees right of center; lobby just above center

Nikon D700 + Nikkor 24-70mm f/2.8 @ 44 mm — 20 sec, f/7.1, ISO 400 — map & image data — nearby photos
Night
20-second exposure via timer, with the camera sitting on a ledge

Nikon D700 + Nikkor 24-70mm f/2.8 @ 62 mm — 1/100 sec, f/3.5, ISO 1800 — full exif
Curious George
trying on Anthony's preschool-graduation suit

The Japanese school year ends in March, so he graduates from kindergarten in a few weeks. It seems like only yesterday that he started preschool, but that was three years ago, and he's doubled in age since then. (Sometimes I think that I have, too.)
Like his recent his first solo outing and losing his baby teeth.... more signs of growing up.

D700 + 70-200mm f/2.8 + 1.7× TC @ 340 mm — 1/500 sec, f/5.6, ISO 360 — map & image data — nearby photos
Thin Slice
I love playing with the isolation that a thin depth of field offers, and a 340mm lens wide open offers a pretty darn thin depth of field.
I was at the Kamo River for an Anthony school event, and snapped a few pictures of a hedge of long thin branches. The next two shots are of pretty much the same scene from the same location, but the first is focused further away, while in the second the focus point is closer to the lens...

D700 + 70-200mm f/2.8 + 1.7× TC @ 340 mm — 1/500 sec, f/14, ISO 3200 — map & image data — nearby photos

D700 + 70-200mm f/2.8 + 1.7× TC @ 340 mm — 1/500 sec, f/14, ISO 4000 — map & image data — nearby photos
Both are at f/14 which should generally give a fairly deep focus area, but with this much zoom you can still get some nice isolation.
Here's an amazing example of depth-of-field isolation and a moving point of focus, a short (90-second) video Zak Braverman made with his video-capable Nikon D90 and a Zeiss 100m f/2. There's not much plot, but it sure holds a few exciting surprises.
A few more examples from the day...

D700 + 70-200mm f/2.8 + 1.7× TC @ 195 mm — 1/500 sec, f/5.6, ISO 360 — map & image data — nearby photos
Tea

D700 + 70-200mm f/2.8 + 1.7× TC @ 340 mm — 1/500 sec, f/4.8, ISO 450 — map & image data — nearby photos
Birds
full frame
The depth of field is so thin here there's just no forgiveness. I wanted the focus on the center bird's eyes, but I missed it by a centimeter or so, and now you can't even see the bird's eyes in the resulting mush....
 Masked Bandit stole my focus -- Kamogawa -- Kyoto, Japan -- Copyright 2009 Jeffrey Friedl, https://regex.info/blog/")
( closeup-crop of the previous photo )
Masked Bandit
stole my focus
Generally, my standard mode of operation is aperture-priority, where I choose what depth of field I want and let the camera figure out the rest. If you've seen more than a few of my posts, you know how much I tend to go for the thin depth of field shots.
Heck, my first post after I got my first digital SLR, when I still didn't really know how to use it, includes depth-of-field isolation, like this shot of Anthony looking at fire trucks:
")
Nikon D200 @ 56 mm — 1/160 sec, f/4.8, ISO 100 — full exif
( from my January, 2006 post Fire Department Parade, and my new D200 Camera )
It would have been totally flat if the truck were also in focus.
I must have posted hundreds of examples since then. Heck, this very same riverside area was fruitful last spring (A Pleasant Day Along the Kamo River), and not long before that I posted a few shots with Selective Focus, but without much comment.
Here's a great example with an ultra-fast lens showing Anthony holding a toy that's completely blurred even though it's right in front of his face.
Here's one from three yeas ago: Motherhood Knows no Vacation. Well, like I said, there must be hundreds. They're sort of easy to spot if you browse the “photos appearing in...” pages. It's fun to browse in there, if I do say so myself :-).

Nikon D700 + Nikkor 70-200mm f/2.8 @ 155 mm — 1/320 sec, f/2.8, ISO 6400 — full exif
A Week Ago
being silly prior to getting a haircut

Nikon D700 + Nikkor 24-70mm f/2.8 @ 70 mm — 1/125 sec, f/8, ISO 4000 — full exif
Yesterday
after he discovered adult teeth coming in behind his lower-front teeth
 Today having some ice cream, because... -- Kyoto, Japan -- Copyright 2009 Jeffrey Friedl, https://regex.info/blog/")
(out of focus, sorry)
Today
having some ice cream, because...

Yesterday morning, Anthony was all excited to tell me some “good news for everyone!”. He had discovered adult teeth poking out behind his front-lower incisors. Many of his classmates have already started losing their baby teeth – a big step toward being oniichan (a “big kid”) – so he's been eagerly awaiting the event.
For my part, I was shocked at how far behind his baby teeth the adult teeth had come in. I don't know what's supposed to be normal, but it just felt very wrong. I didn't let on to him about that worry, of course, so I shared in his excitement. He was also excited because he had heard about a really cool dentist with chocolate-flavored medicine, and you can watch a TV on the ceiling, and “it doesn't hurt at all”. He was positively giddy at the thought of visiting such a fun place.
Fumie and I were positively giddy that he wasn't screaming and crying.
That dentist was closed yesterday, but this morning, Fumie was able to finagle a reservation for this afternoon, and so we went.
The questionnaire Fumie filled out when we got there had all the standard new-patient questions, and also a bunch like the name of his teacher, school, friends, favorite foods, hobbies, etc. This was made available to the doctor when Anthony was brought in and was actually set on Anthony's chest so that the doctor could see it at a glance while working on Anthony, allowing him to chat up Anthony with familiar, calming things.
Just half an hour later, Anthony was done. He was a bit scared about what had gone on, but much of it was likely because he didn't know what had gone on: he didn't realize that his teeth had been pulled until I told him.
I don't remember what it was like when I was a kid, but in Japan, losing your baby teeth is a huge moment of pride for the kid... a sign that they're growing up. Everyone was congratulating him.
I brought some of my American culture: after clearing it with the nurse, I promised Anthony ice cream.... loads of ice cream. That helped later as the anesthesia started to wear off during the drive home.

Anthony's Baby Teeth

The Same Teeth
5 years, 8 months, 6 days ago, when Anthony was 6½ months old
This milestone in growing up comes less than a week after Anthony makes his first trip to the store all by himself.