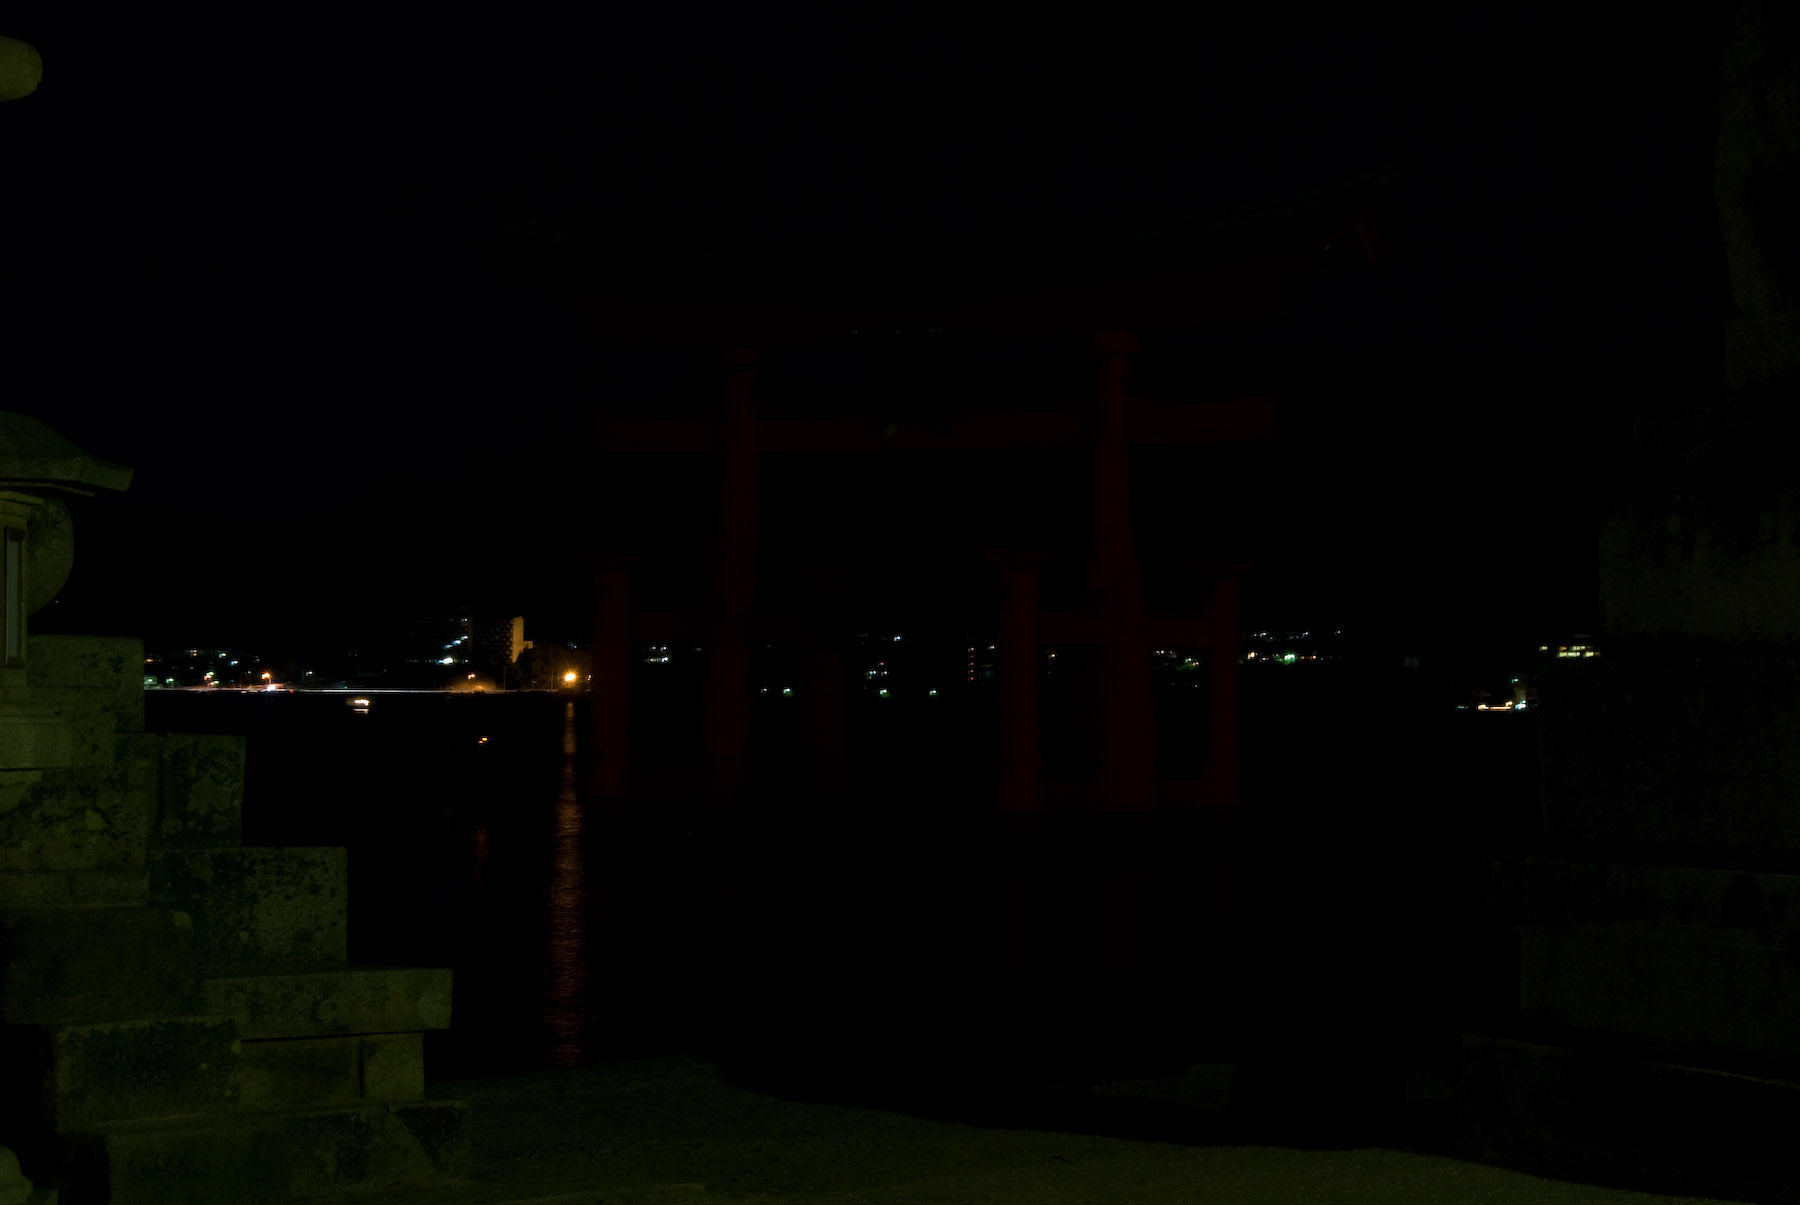
Nikon D200 + Nikkor 18-200mm f/3.5-5.6 VR @ 56mm — 22 sec, f/9, ISO 200 — map & image data — nearby photos
Dark
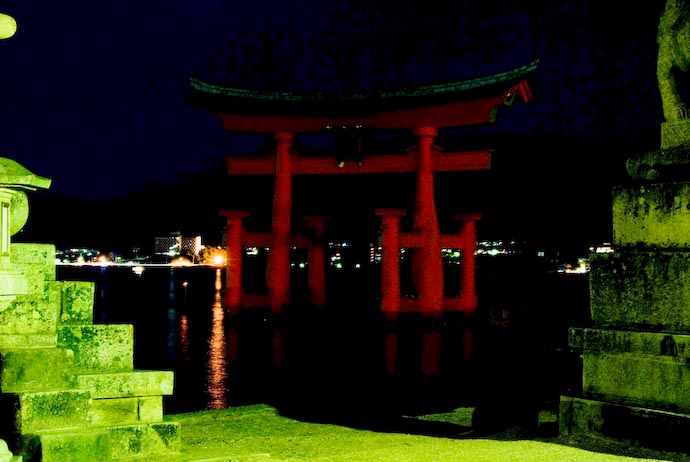
While taking long exposure night shots of Itsukushima Shrine's Gate (厳島神社、宮島) in Miyajima, the brilliant illumination was turned off, and the area became quite dark. I thought I'd give it a try with the lights off, but as you can see above, my one attempt came out completely dark. Since it was late, I didn't want to spend the time trying again for a more reasonable exposure, so we packed up and returned to the hotel.
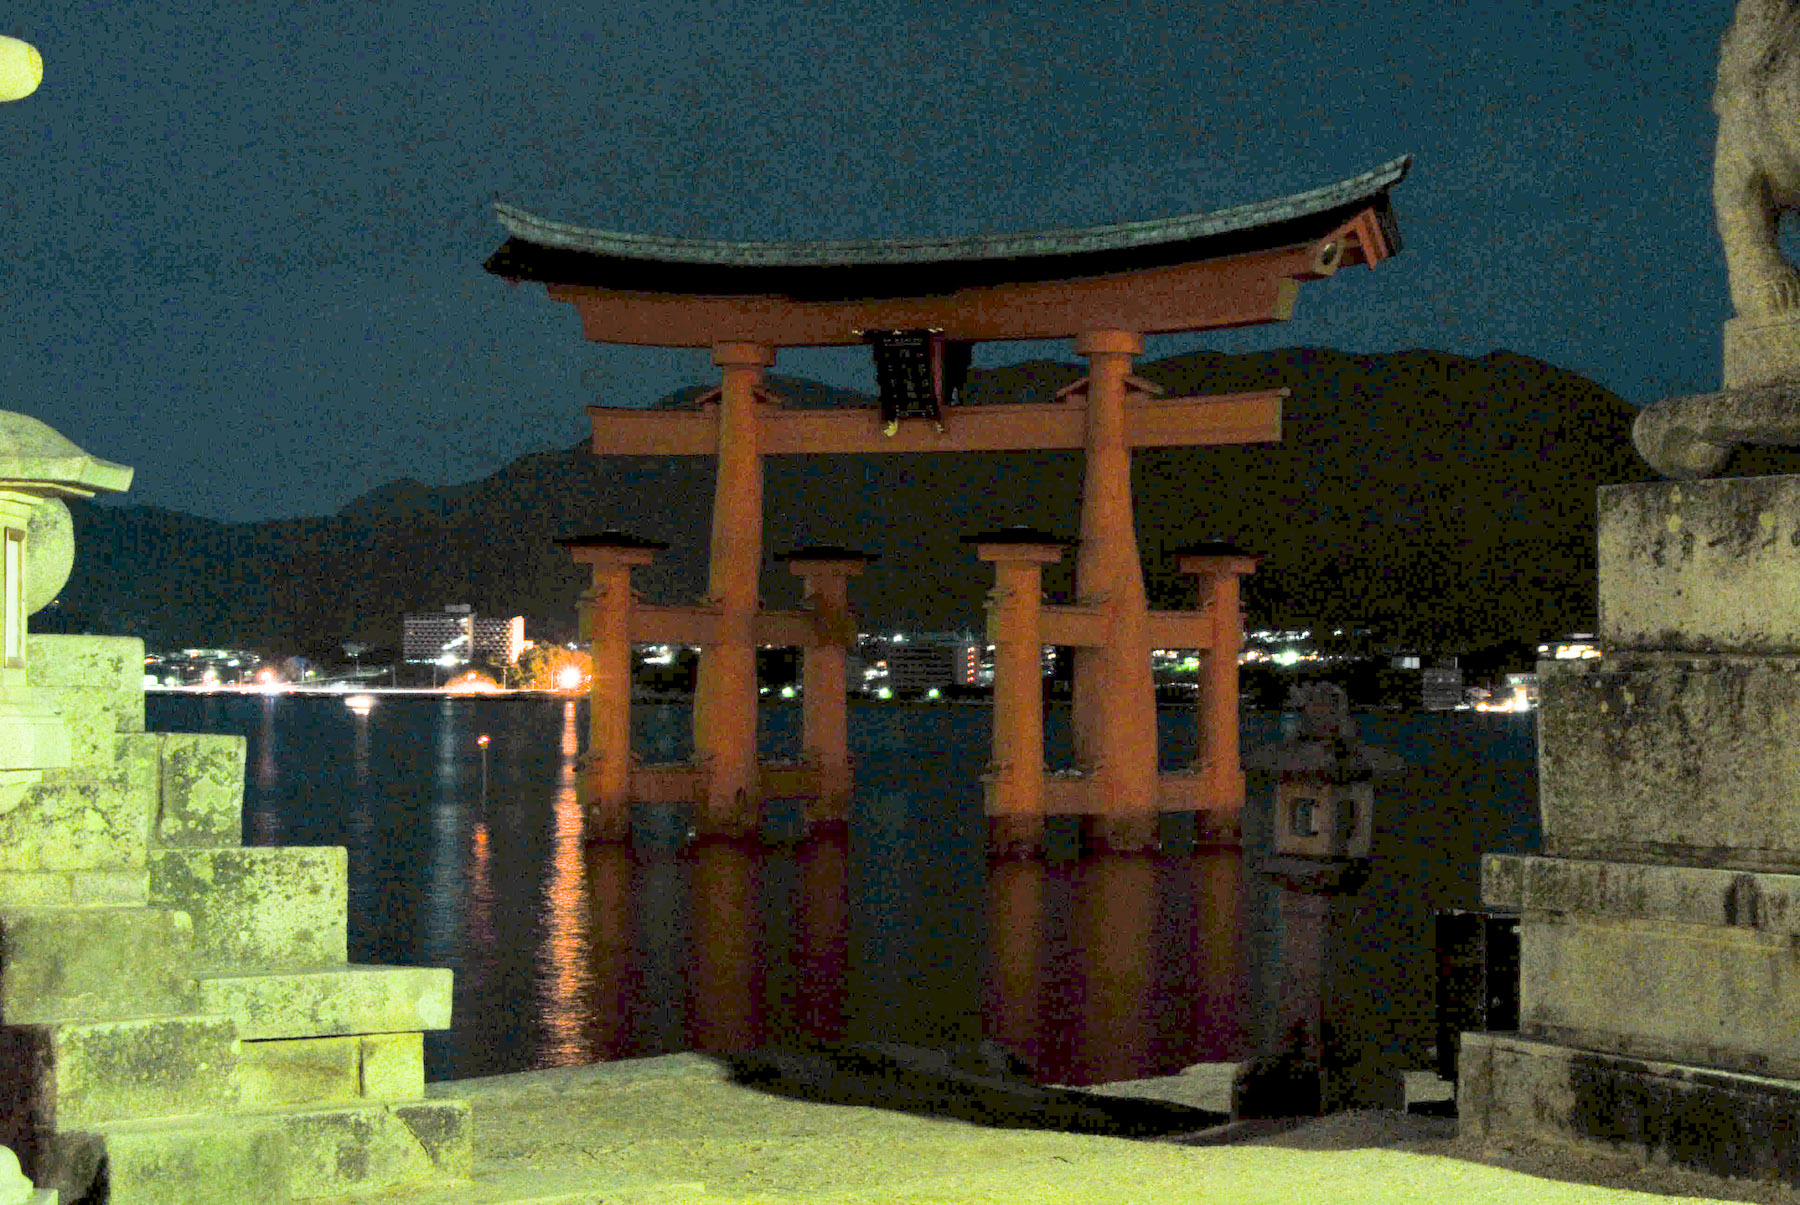
When I got home and loaded all the images into Lightroom, I intended to delete this one along with all the other rejects. More out of habit than anything else, before deleting it, I tried the “auto tone” command (Control-U on Windows, Command-U on a Mac). The auto-tone command is like “developing for dummies” in that it automatically adjusts the exposure, fill light, etc., to create a more pleasing image. As you might imagine, such an automated task often has less-than-pleasing results, but it costs nothing to try and often results in a good basis from which to make further tweaks.
In this case, I didn't expect much because the image was mostly blackness, so I was shocked that the result was actually not too bad:

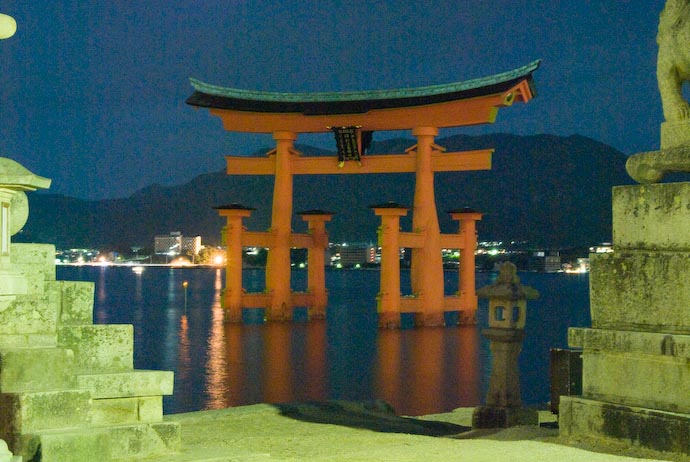
Nikon D200 + Nikkor 18-200mm f/3.5-5.6 VR @ 56mm — 22 sec, f/9, ISO 200, P.P. boost: +3.60EV — full exif
Same Image, After Lightroom's “Auto Tone”
My first thought was “wow, that was hidden in there?”
One of the reasons this is possible is that I shoot in raw (Nikon's somewhat lossy compressed NEF) and not JPG. Even though all the detail is lost in the “too dark to see” region of the original's color space, it's still there to be exposed by shifting everything up into the “can be seen” region.
During the shift, minor differences in pixel-to-pixel color or brightness also become exaggerated as well, resulting in a very grainy image, but that's a small price to pay for pulling a not-too-bad image from a nothing-there-at-all hat (especially considering that it took just a fraction of a second to hit the two keys required to make it happen).
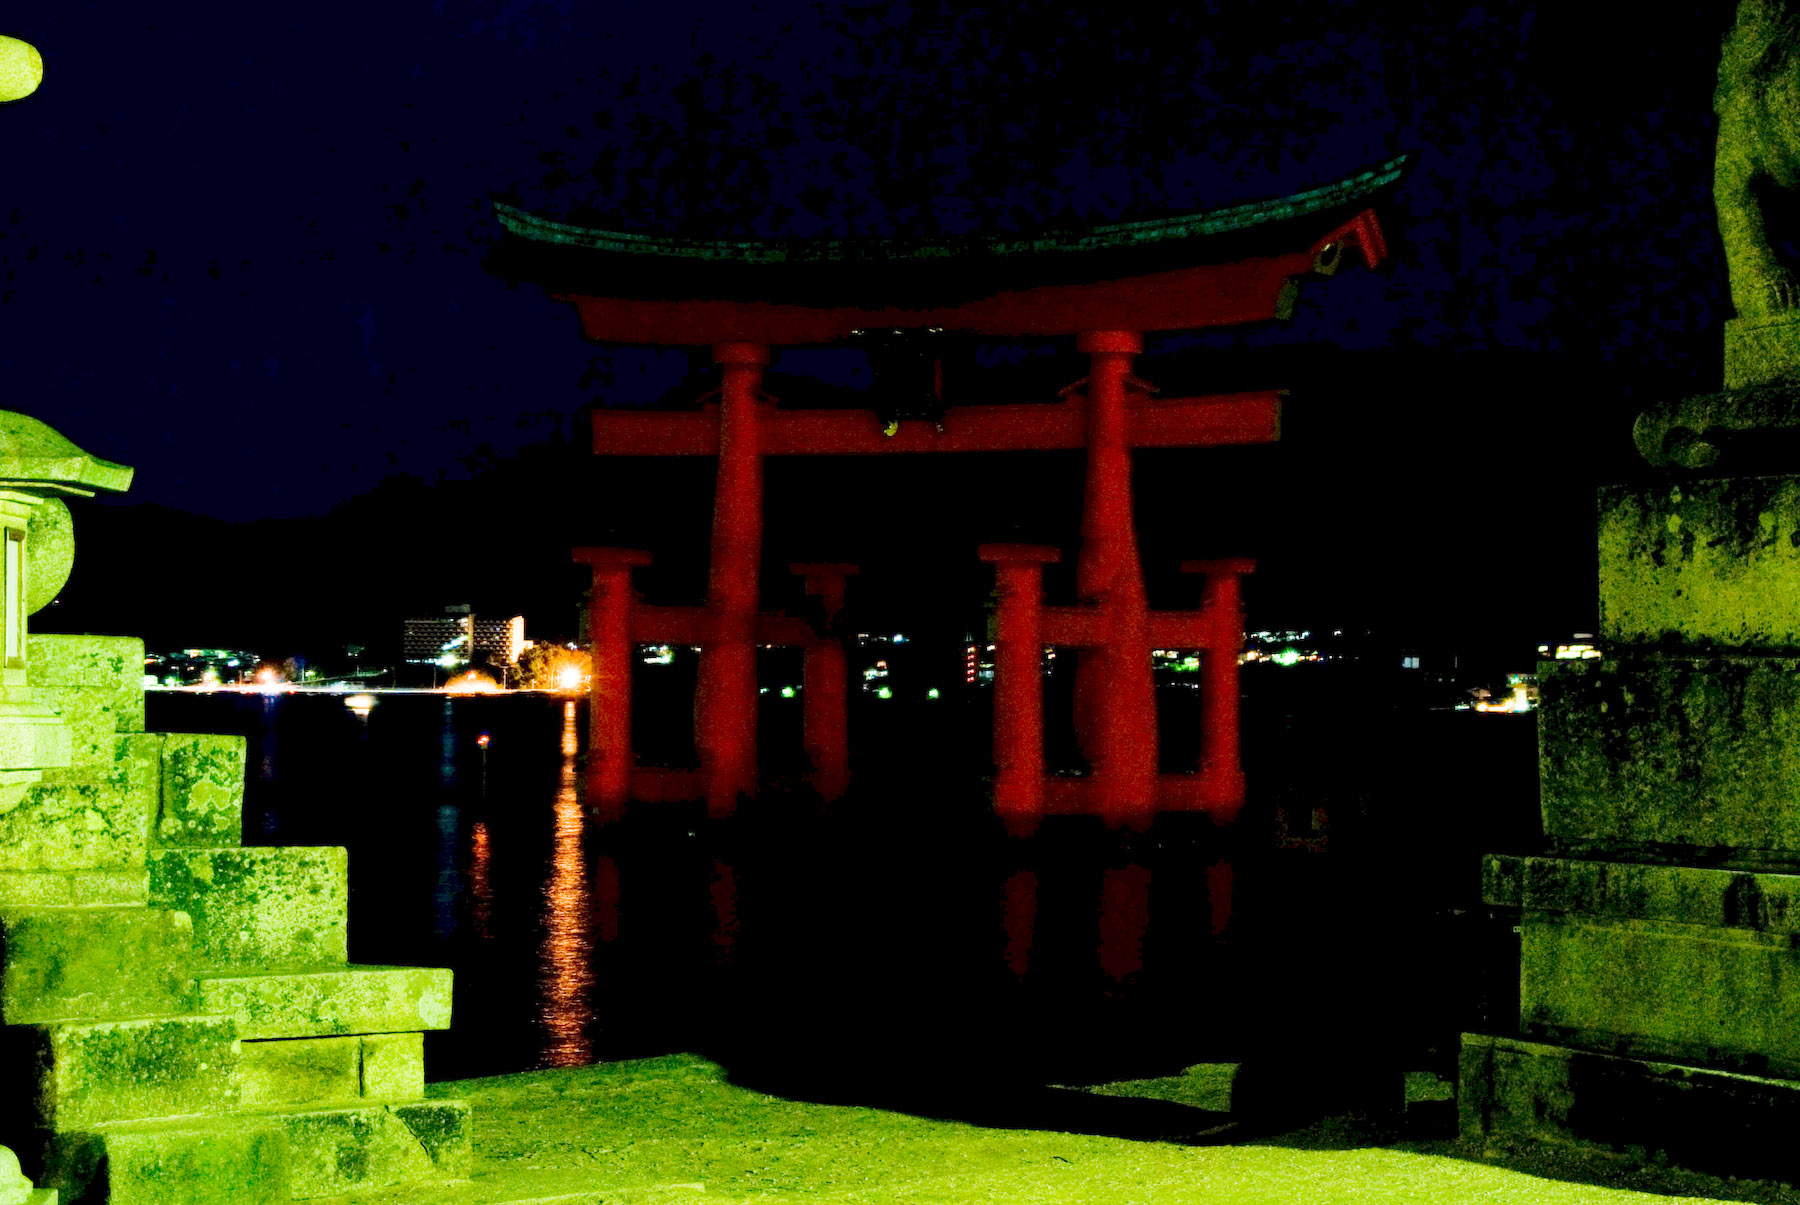
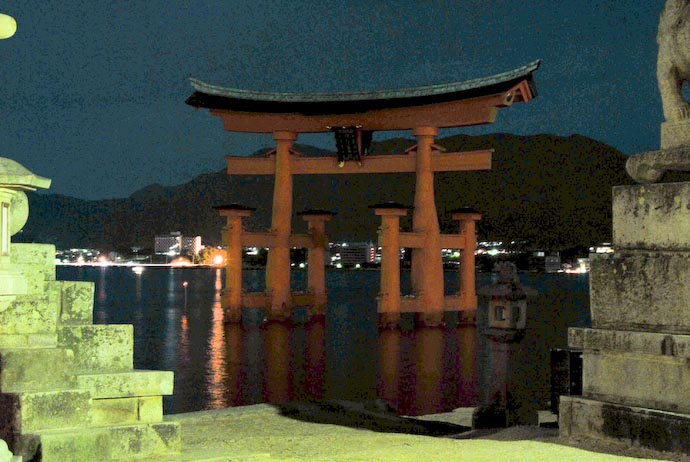
For comparison, I extracted the full size JPG image embedded within the NEF, loaded that into Lightroom as a separate image, and applied auto tone to it:
In-Camera Basic-Quality Embedded JPG, Auto-Toned
This is worse, but still better than I would have expected. It has less detail and more splochiness, both because it's a JPG (with 8 bits of precision per color, as opposed to 12 in the NEF), and because of the high amounts of JPG compression used in the version embedded in the raw file (the same as the “basic” quality setting).
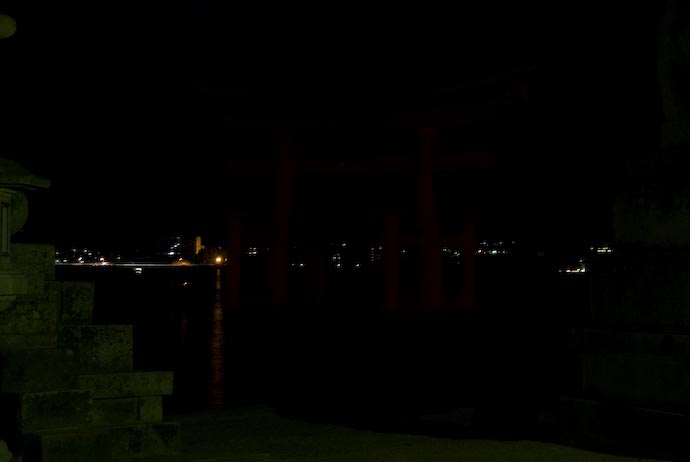
It's not really fair to judge jpg/raw differences with a “basic” quality JPG, so I thought to export from Lightroom a high-quality JPG of the original dark scene, then re-import that as a new image and apply “auto tone” to it. However, the result here is much worse than with the in-camera JPG above:
Lightroom-Created High Quality JPG, Auto-Toned
I'm at a loss to explain why this version is so much worse, and worry that I'm missing something very obvious. In one sense, though, it's all a moot point for me because I shoot only raw. Still, I don't like not understanding.
For easier comparison, here are the four images again, overlaid on each other. Just mouseover the buttons below to see the named version.
Remember, the auto-tone versions have had only the automatic “auto tone” command applied to them, with no human artistic or technical skill applied.
Highly related: “Overexposure and Underexposure, and the Compensation Thereof”
Highly related: “How Shooting Raw Saves Me (In This Case From a Fritzing Lens)”
Jeffrey, believe the difference between the JPG made from the RAW and the in camera JPG, is normal.
When you make a JPG from a RAW, just exporting it, much of the detail contained is lost in the processing and compression. In the in camera JPG, no processing is done, it is exactly as recorded….
I’m not exactly sure what you mean here, but it sounds wrong. The in-camera JPG is not “exactly as recorded” (that’s the raw data), it’s the processed and compressed result of the camera’s sensor-to-jpg engine, and it shares the same data limitations as any other 8-bit jpg (limits that are inherent in the file format).
NOW, if you take that in camera JPG, and convert it to a TIFF file, you can modify it even more, and many times get a better image. Modifying contrast, brightness, color, etc. Then, convert it back to a JPG for display.
Many “bad” JPGs made in camera by relatives, which had no modification, have salvaged pictures many would have discarded. Even large group flash exposures where the foreground were over exposed a bit, and background faces almost unrecognizable. In Photoshop circled the face with a “magnetic lasoo tool” then adjusted them individually, and brought out all the detail.
Sometimes using Dodging and Burn in Brushes to modify small areas, etc..
Bob
Indeed, many seemingly-poor jpgs can be salvaged by good editing; I intended to imply only that the range is wider when working from raw data. —Jeffrey
Jeffrey,
I have no idea if you’ve resolved this, but it certainly looks like the difference you get when you apply auto tone on the camera’s jpeg and the jpeg from lightroom is due to a different curve used. That is, if the curve used by lightroom pushes the “shadows” (which end up being midtones after autotone, assuming autotone is sort of like autolevels or something like that) lower than the camera does, this should happen. No?
Anyway, I enjoy your blog when I read it (much more than I enjoy fighting with regexps, I could add).
You seem like a technically adept, photographically competent guy, so you’ve probably accounted for this already, but it’s possible you did simply overlook something obvious. I certainly do, often enough.
When you load a raw file into lightroom, it automatically clips shadows with a setting of ‘5’, and increases contrast and brightness. If you leave these settings as default before exporting to jpeg, you’ll lose a lot of your shadows. Having read other posts of yours, i have no doubt that you know this… but it’s possible that it just didn’t come to mind.
The data at the low end of the range can often be detail, but also it can often just be noise. Lightroom’s default behavior seems reasonable enough, but it’s just a starting point. Also related, even before you get to the point where you can adjust that setting (the “blacks” setting), is the camera calibration. Since one of the LR2.x updates (LR2.2 or LR2.3), many common cameras now have multiple calibrations to choose from, and the difference among them can be dramatic. I believe that they take effect before the other develop settings are considered, so are now the most basic control, and shouldn’t be forgotten. (They weren’t available at the time I originally wrote this post, and frankly, I probably wouldn’t have mentioned them even if they were because as dramatic as they can be, they’re nothing compared to the huge impact of the raw/jpg choice.) —Jeffrey