Nikon D200 + Nikkor 70-200mm f/2.8 @ 200 mm — 1/2000 sec, f/4, ISO 500 — map & image data — nearby photos
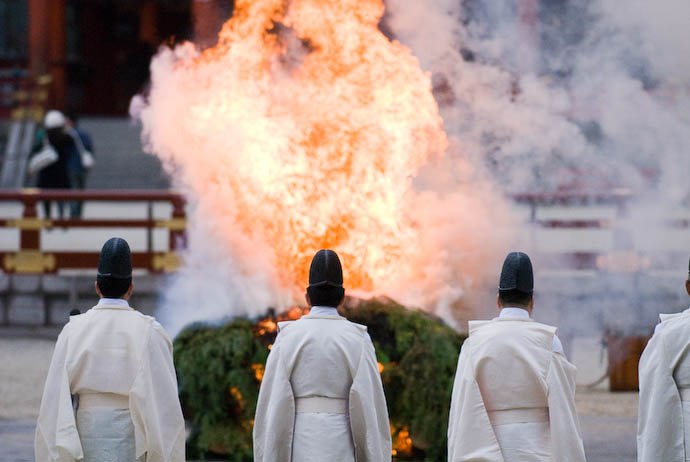
There is No Yellow in this Flame

Nikon D200 + Nikkor 70-200mm f/2.8 @ 200 mm — 1/250 sec, f/5.6, ISO 400 — map & image data — nearby photos
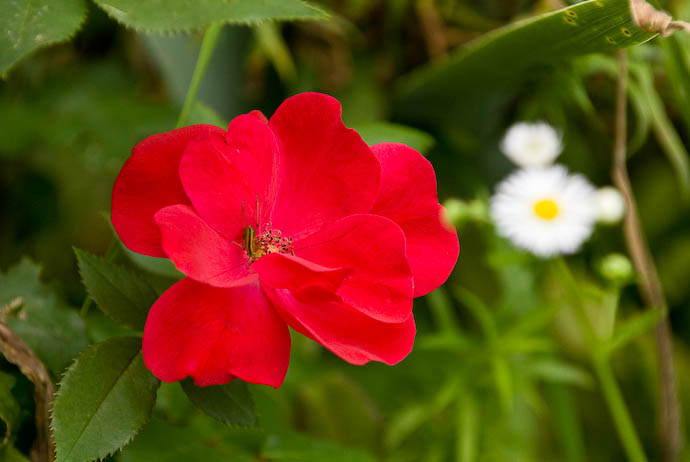
There are no White Highlights in this Flower
(but there is a cricket)

Nikon D200 + Nikkor 17-55 f/2.8 @ 20mm — 1/30 sec, f/4, ISO 500 — map & image data — nearby photos
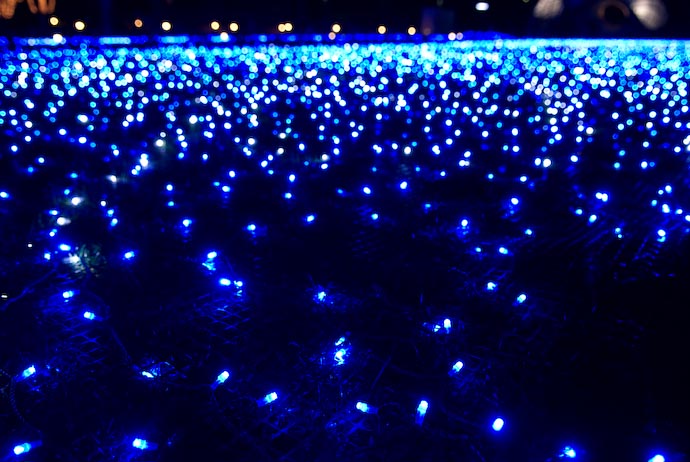
There is Absolutely no White in this Display
I was a bit off the mark in yesterday's post about color limitations, where I placed the blame for the lost color detail completely on current imaging technology, when in reality much of the blame should have been placed on the consumer-level LCD in my MacBook. When I'm not traveling, I'm used to using a much-higher-quality Eizo monitor, and I simply forgot that I wasn't anymore.
Perhaps I'll be off the mark with today's post as well, but yesterday's post reminded me of something that bothers me a lot while I'm post-processing my photos in Lightroom and Photoshop: increasing brightness lowers saturation, driving all colors eventually to white.
In casual conversation, “chromaticity” can be replaced by “color”, but they're really quite different. Chromaticity refers to a physical state (a specific relative mix of light frequencies), while color refers to our human interpretation of those waves, and that interpretation is strongly dependent on context.
For example, lights that might be considered white and orange in one context may well be considered dark gray and brown in another, brighter context.
So, changing the brightness of a light can change its color, but its chromaticity stays the same.
In the real world, red that's bright is bright red, not pink or white. In the real world, increasing brightness does not change the chromaticity of light – it doesn't lower the saturation, or “wash out” the color. But in Lightroom and Photoshop, increasing brightness inexplicably pushes everything toward white.
I understand the limitations with image sensors and film, that if you overwhelm them with photons, white will be registered. I also understand that if you blow out one or two of the color channels, the end result will be a color skewed away from the blown-out channels. These are sensor-level technological limitations, and although are similar to the effect I'm posting about, are not really related.
In each of the photos above – from posts about a Shinto rite, a blue light display, and flowers in the back yard – I see generally proper colors when I lower the exposure/brightness far enough. That means that the chromaticity has been recorded properly, so I don't understand why, when I return the brightness to its proper level, the proper colors are replaced by white, or by some color leading to white (e.g. the orange by yellow, in the flame).
I suppose there is some value, for someone, in mimicking the ill effects of sensor limitations, so that if you increase the exposure in Lightroom, you get the same washed-out effect as you would had you increased the exposure while taking the shot, but this seems dubious as a default operating procedure.
So, if washing out to white is not the answer, what do I think is? Well, now we have arrived at the crux of the problem. You can't do what you want (increase the brightness indefinitely) due to the same image-encoding issues mentioned in my post on HDR, and in my series on digital image color spaces. So, what can you do?
One idea is that a color becomes locked once a color channel has maxed out. This could lead to ill effects as some pixels stop getting brighter as the exposure is increased, while those surrounding it continue to get brighter.
A next step to try to mitigate that problem is to have changes in brightness make less and less effect as pixels come closer and closer to maxing out one of their channels. This would sort of mimic what Lightroom's “brightness” control already does for a pixel's three-channel combination: it has less and less effect the closer a pixel already is to white. (That's how the “brightness” control differs from the “exposure” control.)
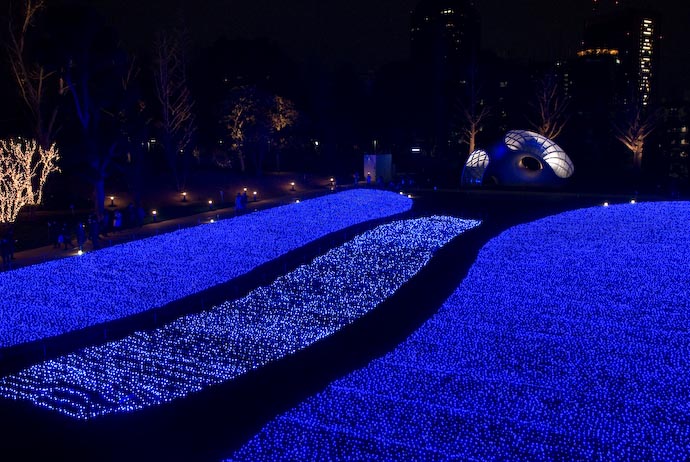
It may well be that I'm all wet, and that either of these techniques would result in disjointed effects worse than what we already have, but I don't think so, at least not always. Consider the following image, from a different post about the same light display:
The middle section of the display was a mix of blue and white lights, but the outer two sections were pure blue (so pure and so intense that it actually became a bit painful to be there after a while). In the original version of that photo, all three sections looked the same – a mix of white and blue – due to a combination of sensor limitations and the washout-to-white effect.
In Photoshop, I painted back blue where there was white in the two side sections, and the result was horribly posterized. But when I eased it back a bit – effecting my second idea above – the result was not perfect, but it was much better. That's the version you see here.
As I said, it may well turn out that these ideas are more utopian than practical, but I'd like the opportunity to find out, so I hope for a “chromaticity-preserving brightness” control in Lightroom.

You might try running that flame photo through the new Adobe profiles. Adobe Standard or Nikon Standard might yield different color results. Some of the profiles have color balances that add up to less overall brightness thus preserving some colors that Lightroom’s defaults can make white or pale. Not that this solves the problem you are talking about in every sense, but it can be illuminating to see other settings and the effect they have on color and color brightness.
I would guess that in order to achieve the maximum tonal ranges and contrast in a proper exposure, digital photos have nowhere to go but white in order to represent the brightest areas of color in high contrast situations.
This doesn’t happen on film? Or does it?
Jeffrey, I’m no colour expert, but I think the limitations are due to RGB colour rather than the profiles themselves. The difficulty being that in RGB color the chroma and luminance data are encoded into each of the colour channels.
I suspect that if you edited these images in the LAB colour space (which separate the chroma data from the luminance) you would avoid the “fade to white” problem. Of course you will likely end up with lots of unreal colours too (colours that can’t be rendered on screen or printer.
Cheers, –Kip
From your description, it sounds like the raw data is not clipped. Therefore your experience is probably a result of sRGB gamut clipping rather than any limitation of the camera. Take a look at a 3D comparison of sRGB versus ProPhoto RGB and it’s pretty clear that the brightness of sRGB reds are pretty limited.
I’m not sure how you propose to get brighter reds than sRGB allows without either clipping the entire flower (it will be as bright as saturated red can look in sRGB, but it will be VERY flat) or by accepting some reduced saturation. The physics just don’t seem to allow another option unless you use a wider color space such as Adobe RGB, but considering that you posted for the web I’m assuming that your using sRGB.
Personally I like to use local exposure reduction using Lightroom’s HSL Color Adjustments so I can bring saturated colors back into gamut without having to do a global adjustment on the whole image. Of course there are probably much more powerful methods available in Photoshop, but I find the results from Lightroom are well enough to my liking.
Mike
Hi,
I have been reading your blog for 4 days. It is better that most of the books I read recently.
I use Lightroom 2 and to do what you mentioned as “chromaticity-preserving brightness” I use “recovery” slider. Have you tried that? Still not perfect, but sometimes better that “exposure” or “brightness” slider. BTW: I also often rise “blacks” slider “+2” to preserve black parts as black or to darken deep shadows.
Best regards,
Rafal from Poland.
Out of curiosity, have you tried recovering these in PV2012 with -Highlights and +Whites?
Not these specifically, but certainly the Lr4 treatment is a step in the right direction. If you have a web page showing the different results with Lr3/Lr4 for your recent fireworks shots, please add a comment with a link! —Jeffrey