
Nikon D700 + Voigtländer 125mm f/2.5 cropped — 1/1000 sec, f/2.5, ISO 200 — map & image data — nearby photos
Almost Lost
DEC 2011 UPDATE: the “v3” camera profiles mentioned below have now been supersceeded by “v4” profiles mentioned here, available with Lr3.6.
If you shoot with a Nikon D3, D700, or D300, and use Adobe Lightroom or Photoshop, you'll want to know about the “Camera v3” beta camera-calibration profiles described in this Adobe-forum thread. (The actual profiles are in this ZIP file.)
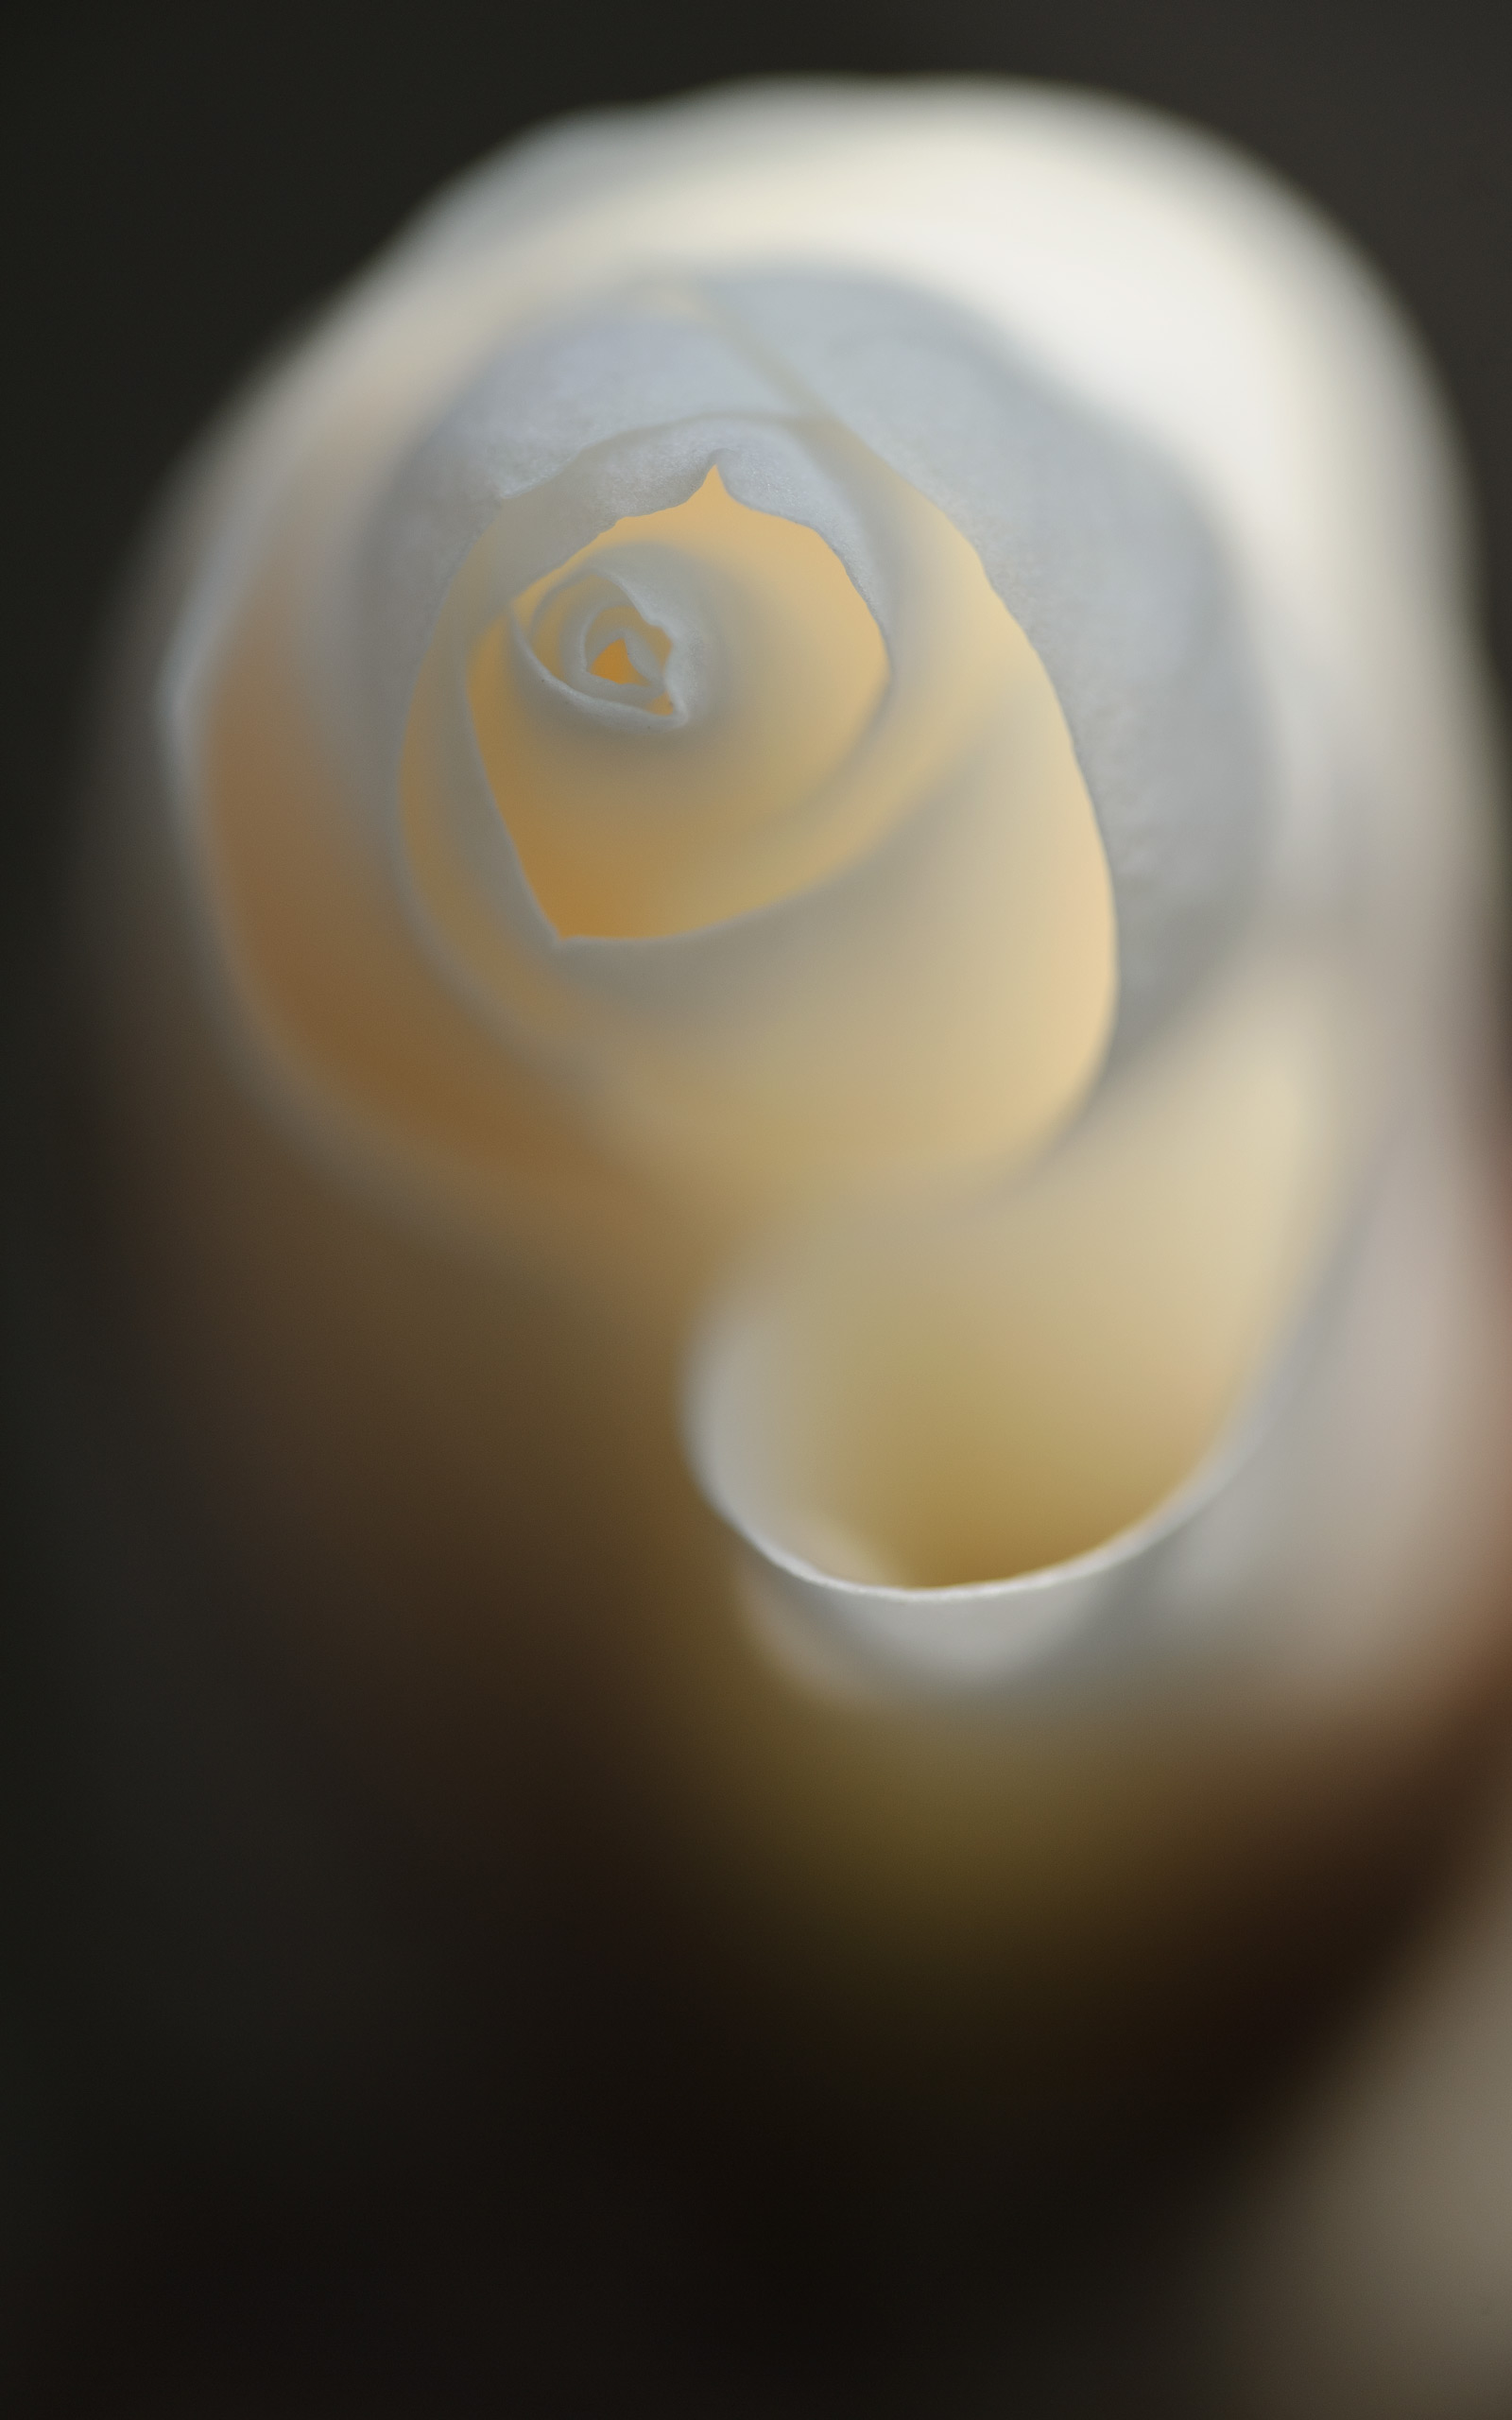
This is important because in some cases, the standard “Camera” profiles that come with Lightroom ACR fail miserably for these three cameras. For example, consider this crop from the photo above:

Mottled Yuck!
“Camera Standard” profile that comes with Lightroom 3
Those mottled magenta splotches are not on the flower; they're a bug in Lightroom's camera profiles for the D3/D700/D300.
(The rest of this post is written from a Lightroom perspective, but the concepts apply to Photoshop's Adobe Camera Raw module as well.)
Lightroom's “camera profiles” are internal recipes for how to convert the camera's raw hardware-specific sensor data into a color image. The camera itself has this built in as part of its JPEG engine, but that's not used if you shoot raw because the whole point of shooting raw is to give you control over the conversion process later. Thus, each raw converter (Lightroom, Aperture, ACR, Nikon View NX, etc.) has the latitude to make the conversion itself, as it sees fit.
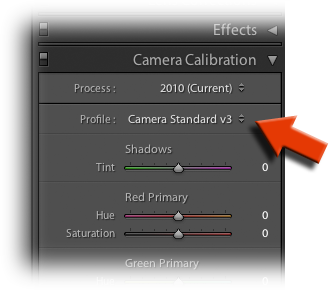
In Lightroom's case, it gives you a choice from a number of “recipes” (profiles) for how the basic conversion to color image data is to be done. In the Develop module, at the bottom of the right-side panel, you'll find the Camera Calibration section, and a “Profile” selector that contains items such as “Adobe Standard”, “Camera Vivid”, “Camera Standard”, “Camera Portrait”, etc.
The ones with “Camera” in the name try to mimic the particular look and feel of the camera's own JPEG engine, with “Camera Standard” obviously being the profile to match what the camera does when it's not in any kind of special-look mode.
I think “Adobe Standard” is the one that Lightroom uses if you don't tell it otherwise, but it's so generic and its results so “blah” that as a matter of course I apply “Camera Standard” automatically to all my images as part of the Lightroom import process. This has worked great for me for years, but every so often... maybe every 5,000–10,000 photos or so, I'll come across a situation like that shown above, where there are clearly errors in how Lightroom is processing the image.
The magnitude of the problem seems closely tied to the white-balance setting, so sometimes it was easy enough to make go away.... but sometimes not, and the photo above is one such example. It happened so rarely that I didn't bother to investigate, but I really wanted to post this flower because it's a clear candidate for membership in the Voigtländer “Exploring the Edge of Creamy Macro Bokeh” club. I'd come across the flower by the side of the road during the “Mountain Play with Monet and Friends” outing a week ago.
So, I asked around and was directed to the Adobe forum linked above, and voila...

Smooth as a Baby's Bottom
with the new “Camera Standard” v3 Beta Profile
All the various “Camera” profiles (Camera Vivid, Camera Standard, etc.) could suffer from the mottled-color problem, at least for Nikon D3/D700/D300 hardware, but it seems it's been completely fixed with these v3 profiles.
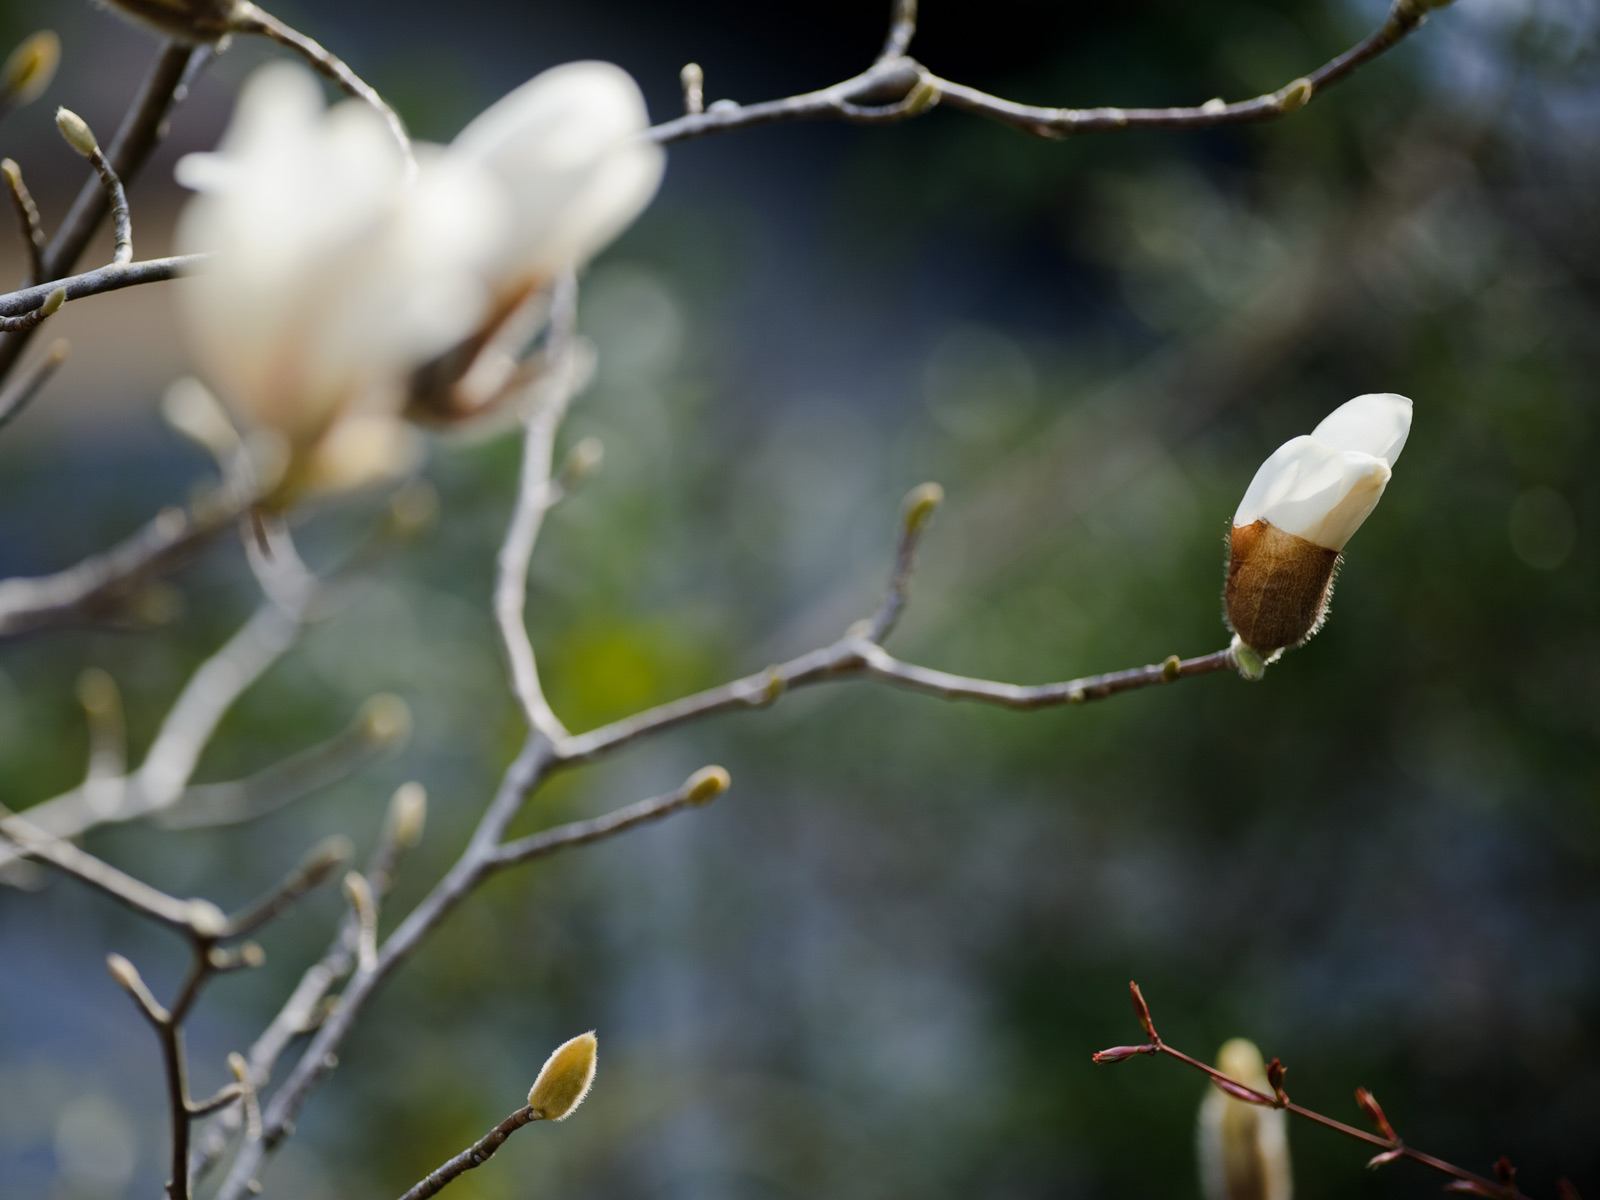
All the images above are crops... here's the full frame, which might make a nice vertical desktop image...

Nikon D700 + Voigtländer 125mm f/2.5 — 1/1000 sec, f/2.5, ISO 200 — map & image data — nearby photos
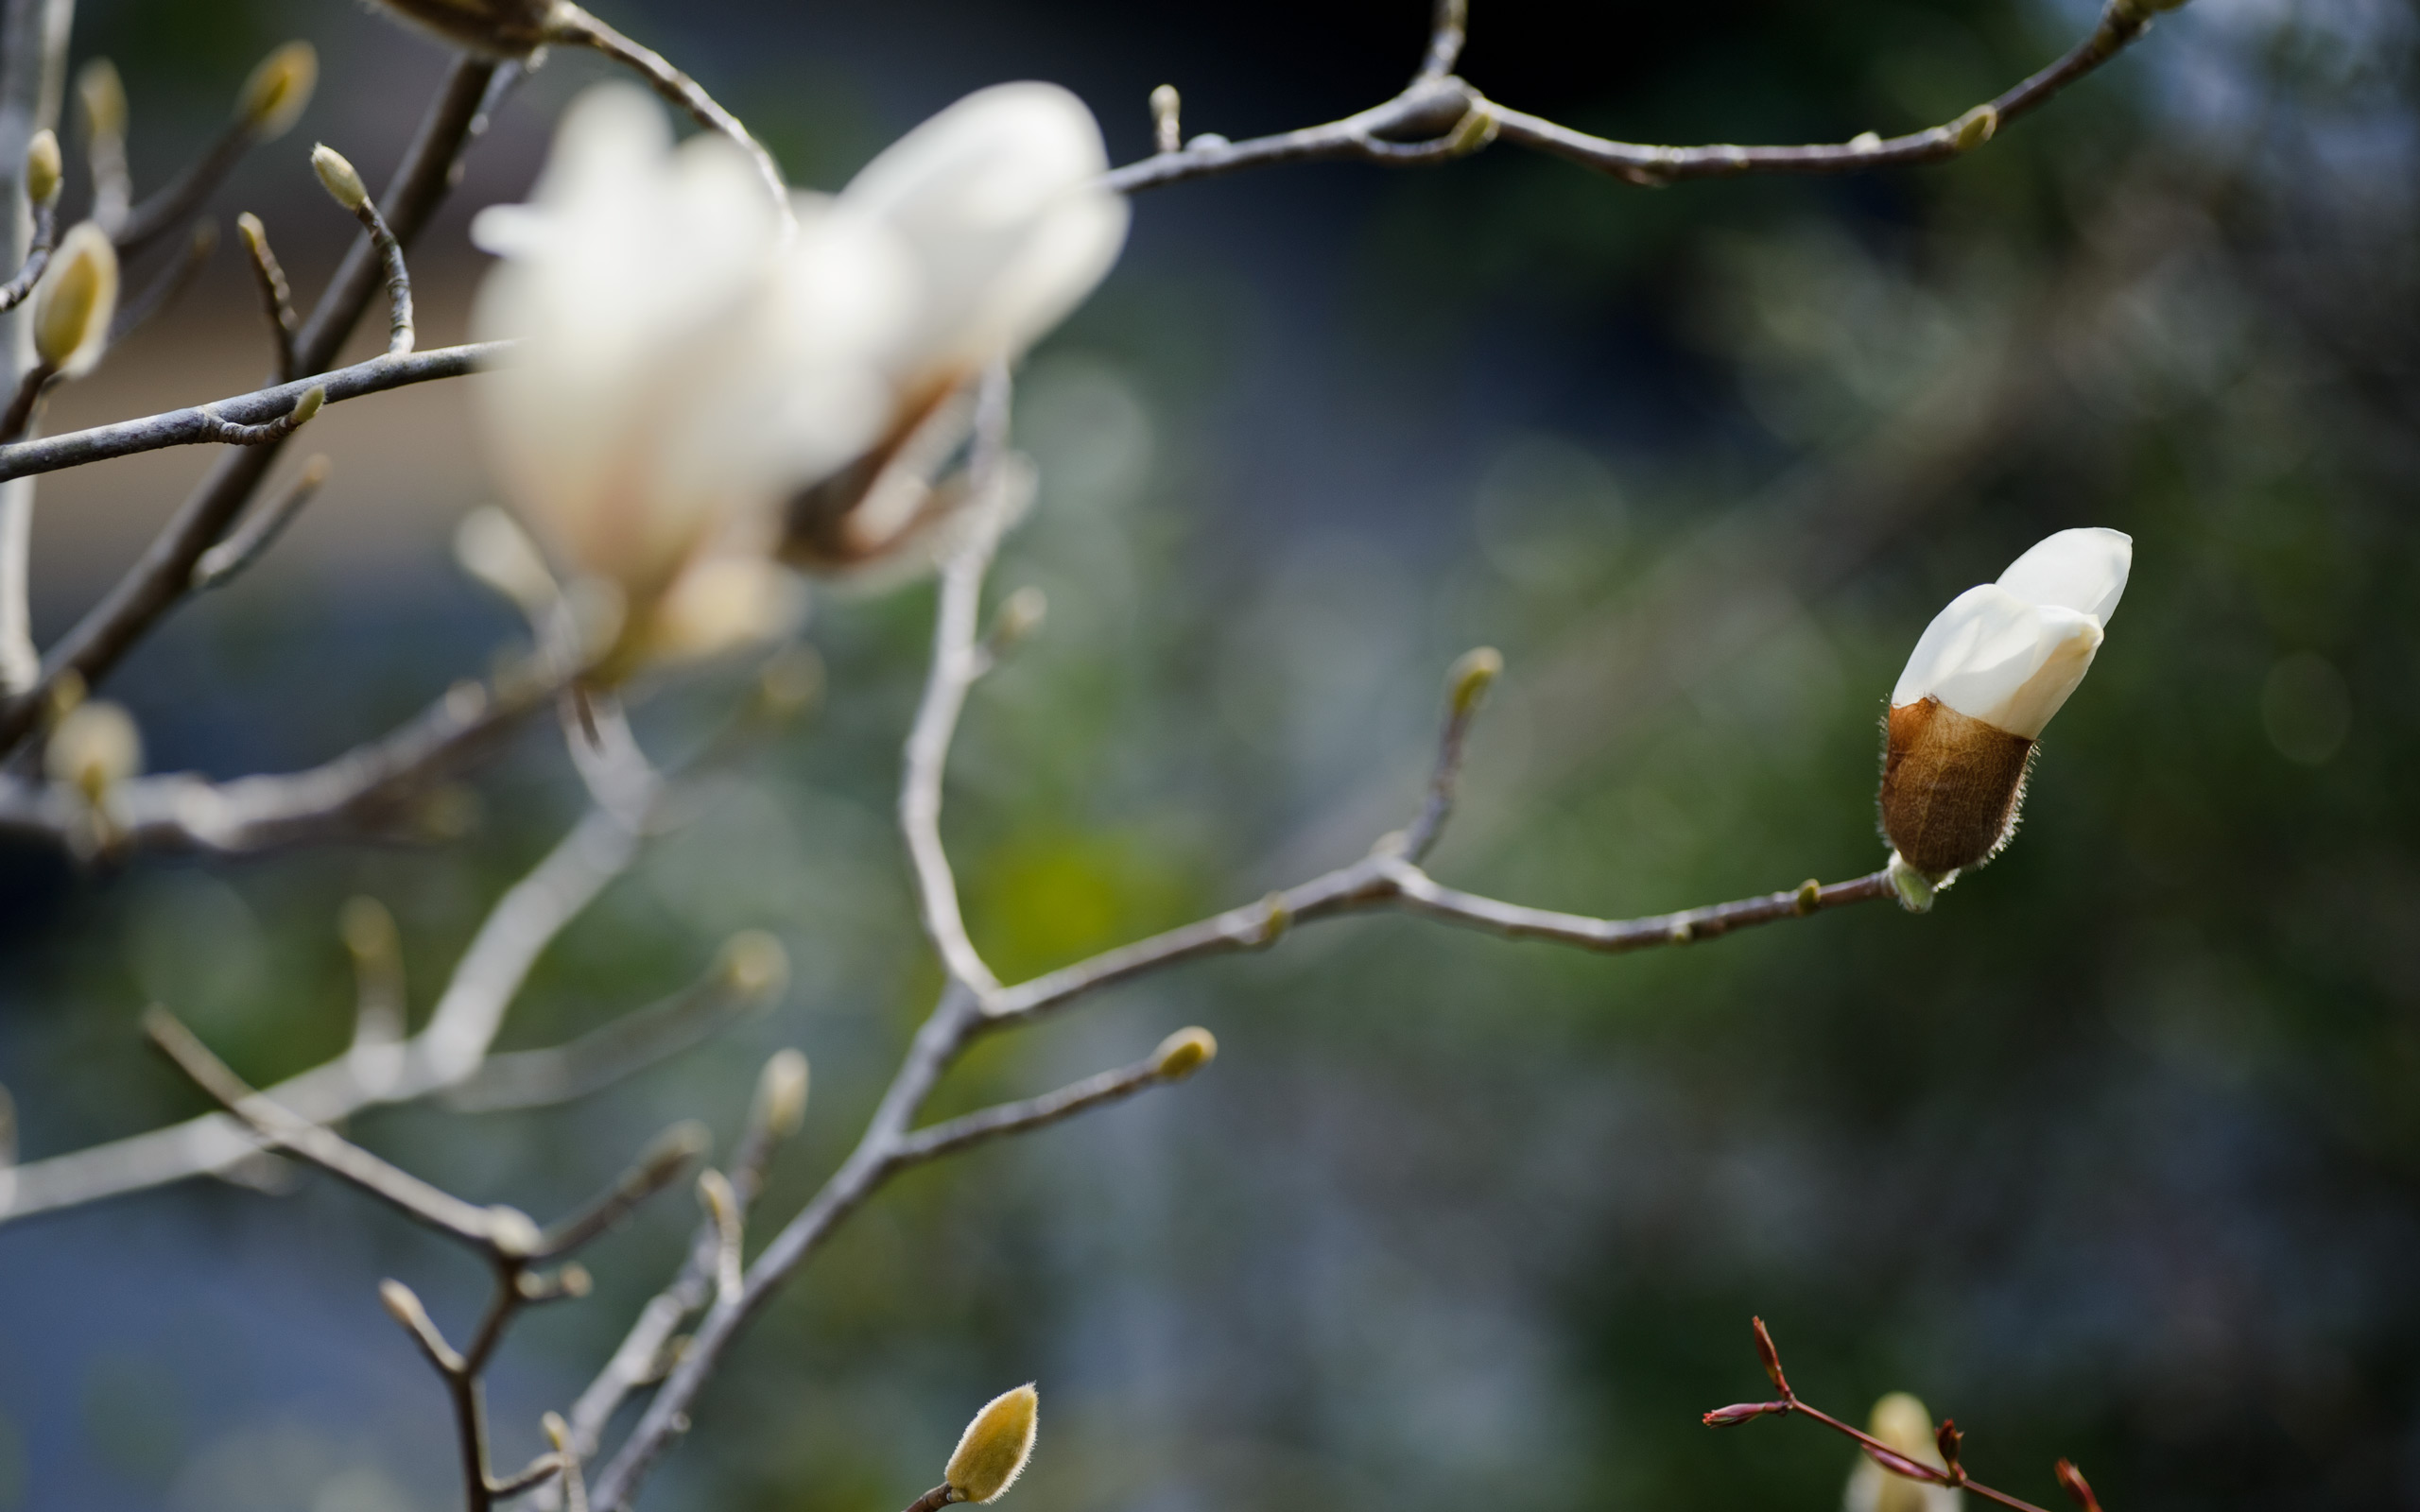
For context, here's a wider view, showing how the sun is shining directly on the rear of the blossom, thus causing it to glow from within when viewed from the top...

I don't know what kind of tree it is, but it had a lot of buds in various stages...

Nikon D700 + Voigtländer 125mm f/2.5 — 1/1000 sec, f/2.5, ISO 200 — map & image data — nearby photos
I was very happy to get these profiles, but I'm not ready to switch to them for all my images. On the plus side they don't suffer from this rare-but-major splotch problem, but on the minus side, they seem too bright for my taste. The initial post in the Adobe thread says to set exposure to -½EV, but even when I do that, I feel details are lost in the highlights. This is just a gut feeling and I need to do more research, including reading the entire forum thread. However, it's important for D3/D700/D300 shooters to know these profiles are available, so I wanted to post about them right away.
Great illustrations. I have been using the v3 profiles for my D300 for quite a while now and tested them for Eric before he posted them. The new profiles also give much better highlight rendering.
Thank you for this article, I experienced the same problem, so I wanted to go back to Capture NX 2. Immediately I’m going to try, I thought it was a general problem Lightroom.
Great shots! And thanks for the info about the profiles. I’m using D300 and will check the new one profiles. I think, sometimes I had this problem to, but corrected it with Photoshop.
What about D7000? Are they affected too?
No, the profiles are very hardware specific, and the issue (and fix) applies only to the three specific models listed. The D300s is not included, for example. —Jeffrey
That a Magnolia Jeffrey. Thanks for the news about the profiles. Very interesting.
Thanks for the heads-up!
Camera profiles also seem to have a big influence on the rendering of details in certain colors, notably saturated magenta-purple-blue areas. I tried to illustrate that some time ago: http://blog.zauber-allenthalben.de/post/2927910978/dng-profiles
Comparisons of profiles is made difficult by the fact that they not only affect hue and saturation of colors, but contrast and brightness as well (as you discovered). I need to switch to different tone curves in LR and/or adjust brightness and contrast to get comparable tonal distribution with different profiles.
Oh, and this time the flowering tree is a magnolia …
Love these super shallow images. I’m sure I’ll be one of many people who will ID the flower as a Magnolia.
Interesting info. The tree is a stellata magnolia.
Is the D3x included in the D3 profiles?
No, the name must match exactly. The D3x may well not need new ones. The problem facing these three cameras seems to stem from the the timing of when they were released by Nikon, and some unfortunate consequences with where the DNG spec design was at the time. I don’t understand it fully, but the D3x being a later camera (and a very different sensor) probably bodes well for it original profiles. —Jeffrey
Jeffrey, just to make sure, the “Mottled Yuck” profile is the one originally installed with LR 3, not the v2 Beta released last spring (http://forums.adobe.com/message/2681151), right?
I did a few tests with my own hard cases, and for some of them the v3 profiles (at least “Standard”, “Neutral”, “D2X 1″ and D2X 2”) are significantly worse compared to the v2… That raises the question how the v2 Beta would have fared with your files; they’re less bright than the v3, as well. (My problems with the v3 might actually stem from a lift in the highlights of their tone curve that wasn’t present in the v2.)
Correct, though with this particular image, v1 and v2 were essentially identically “yuck”. Have you reported your v3-not-so-good test cases to the forum? If not, it’d be great if you could post a one-or-few-image catalog illustrating the problems… —Jeffrey
Hmm, comparisons between v2 and v3 are difficult due to the change in tonality (which can’t be compensated for every picture by simply dropping LR exposure by 0.5 “EV”).
For most pictures it seems I’ll actually be able find a new set of exposure/brightness/contrast/tone curve values that get’s me pleasant results without a lot of additional fiddling.
The most recalcitrant shot for now is the one of mother’s magenta/purple orchids I already used for the profile comparison mentioned in my first comment. With v2 that shot needed exactly exposure +1.0 to get the background blown out white; with v3 I can drop the exposure only to about +0.85 before some parts of the background lose the pure white brightness. At that point the brighter parts of the petals are quite a bit to bright, loosing texture, with a “blotchy” transition to the darker areas. Additionally some of the blotches are decidedly to blue, I think.
But I’ll have to play with it some more before I can blame it on the new profiles with a clean conscience. 😉 Maybe it’s still me …
Hi Jeffrey – it’s been a while, but I was just catching up on all of your posts. I’ve downloaded these and have been using them with my D700 set to -.5 exposure. It does seem more accurate and overall better.
I also notice now that my Recovery slider is working better in that it doesn’t throw colors off when increased, like it used to. Is it my imagination? It seems truer to the colors and is now just adjusting the highlights and not colors. I think you had even mentioned the problem (or maybe it was that darn Scott Kelby) a long while back.
How about D300s?
See previous “names must match exactly” comment. —Jeffrey
Where does one download the v3 profiles?
Uh, the link is in the first paragraph of the post. —Jeffrey
Hello Jeffrey
Thanks for your work
The flower you show is a magnolia japonica
Saludos from Spain
Have you compared your work with the new profiles supplied in the latest update to LR? I now have v4 showing up in the Camera Calibration Profile drop down menu. Since I am new to LR, I am wondering if I should install the older v3 in your link above, or stay with the newer v4.
The “v4” profiles are superior in every way; please see this followup post (which I’ve now highlighted in this article). —Jeffrey