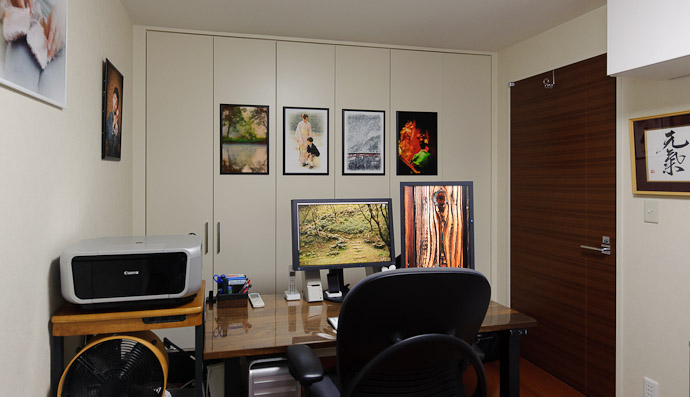
Nikon D700 + Nikkor 14-24mm f/2.8 @ 17 mm — 1/40 sec, f/7.1, ISO 1600 — full exif
My Home Office
brightened up with a bit of art on the wall
The Problem
The room I use as my office at home has a layout not good for much of anything but the bedroom it was designed to be, but space is always tight in Japan, so one makes do as best one can. In this case, my desk is “floating” (not up against a wall as I used to have it when I used a different room for my office) and faces a set of floor-to-ceiling closet doors. This unorthodox arrangement allows the rest of the room to be gainfully employed with bookshelves, exercise stuff, and a bigger-than-most-Japanese-houses La-Z-Boy we brought with us from The States.
The down side is that I face a bland wall of floor-to-ceiling closet doors, but that has recently been remedied with some artwork.
An Idea Presents Itself
A friend recently got a very nice printer (an Epson Stylus Pro 3880), and kindly offered to let me use it. It can print paper up to 17″ wide, which means it can handle A2 paper, about like a medium-sized poster. It can produce very nice results, but it's pricey: one set of ink cartridges (just the ink!) costs 3× what my own consumer all-in-one printer/scanner/copier cost in the first place.
The printer I already have can print photos, of course, but I rarely print anything because I seem to have a huge mental block about the commitment of rendering to a physical medium. I don't quite understand this silly mental limitation, but it's hard to overcome; this opportunity to use large paper with a nice printer gives me a chance to try (to overcome) in a meaningful way.
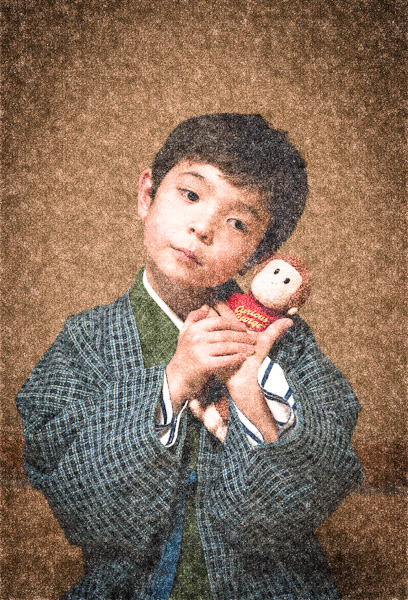
I did a test, printing this shot of Anthony, fitting it into a frame we already had with a green mat that matches the new photo perfectly.
A Solution Unfolds
I got particularly excited about the prospects when I realized that the floor-to-ceiling closet doors that my desk faces would make a perfect place to display some prints. After some testing, I decided that the fairly tall/narrow “A3+” paper size (“A3 nobi” in Japanese, about 13″ × 19″) would fit very nicely.
I found some excellent frames at a local shop.... simple black metal frames by Hakuba that are quite heavy duty and very well constructed. I'd have easily paid $50 for them, but happily they were less than $15 each! I chose black because I figured that a thin black border would nicely set off the print from the off-white color of the closet doors. I would put something on the four middle doors, keeping balance by leaving the edge doors blank. To mount the frames, I used 3M “Command Mini Hooks” Strips (sort of like Velcro™, but better for this kind of application).
Choices, Choices...
I've got 100,000+ photos in my Lightroom catalog, and have published a lot of nice ones on my blog over the years (2,559 photos total last year alone, of which at least some can be considered nice). So when I sat down to consider which few photos to print and display, I suddenly felt overwhelmed.
As I got into it, I started to realize that my bar for what might make a good print was much higher than what might make a good photo online. Part of this is my aforementioned mental block about printing, but part is also an extension of what one naturally notices. An ugly utility pole among fall foliage, for example, like this, sticks out in a photo like a sore thumb because one sees the entire scene in focus at once, whereas in real life most people's attention is drawn elsewhere (the foliage) and the wires and such are not even noticed. (That a photographer does notice them, and proactively considers them during composition, is part of what makes a good photographer good.) So, with that idea extended to a print hung on a wall, suddenly any little imperfection jumps out.
Also, a photo on screen is generally seen in just one general environment (on screen right in front of the viewer), but a print on a wall must look good from across the room where fine detail is lost, yet withstand up-close inspection where little imperfections become big.
I eventually realized that I could hide imperfections, as well as lend a less sterile look to the prints, by giving them a “painted look” with Corel Painter Essentials. I'd played with before, as I described several years ago. I think I have higher artistic standards now, but to a geek like me, “artistic standards” is always an oxymoron. You can get some really wonderful results from Corel Painter Essentials, but it's quite an ordeal because Corel's software design is ridiculously bad. This will all be the subject of a later post.
Oh, and the hiding of imperfections also meant that I could blow up from a smaller crop, using only a portion of a photo. This gave me more options, since the prints were to be tall and narrow, but my tendency in taking pictures has been toward the landscape orientation that presents itself better in a blog setting.
Results
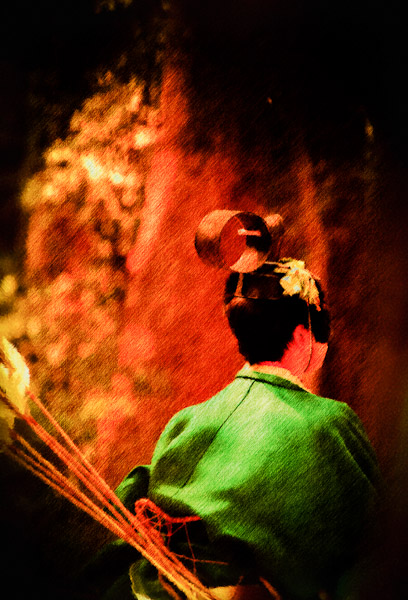
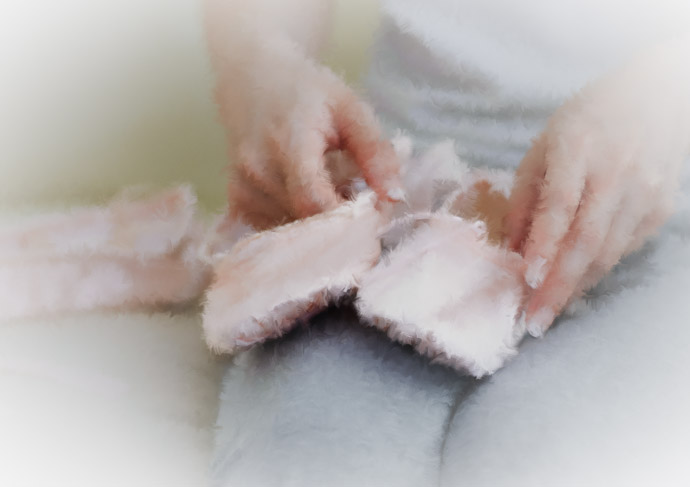
It took the better part of a week (the “busy with a project” mentioned last month on “Feeding Frenzy on the Kamo River”), but I finally came up with a dozen or so items to print. The selection process was an emotionally anguishing task... it's really hard to choose which treatment to give which photo, from among the infinite possibilities to be found in 100,000 photos! I'll eventually print more than I can display at once so that I can cycle them in sync with the seasons, but for now here are the ones I've printed...
(But note that I generated these for print, so even clicking through to the larger version gives only an imperfect sense of the printed result.)
( I would have really liked to use the originally-posted photo, but it wouldn't fit the tall/narrow format I needed here )
I also did an A2-sized print (about 24″ × 17″) in portrait mode for a side wall...
... and another A3+ print as well...
I printed them on Epson professional “Velvet Fine Art” paper, which is very matte (that is, not glossy or shiny like common photo paper). Combined with the professional printer and inks, the quality is much better than consumer-level stuff like my own printer. I put them in frames without any glass cover, so reflections don't mar the view.
You'll notice that these were all prepared so that they don't require a mat. A straight-up photo generally looks better with a mat, so the ability to generate good faux matting is an ongoing project.
Anyway, I'm really happy with the results, and they make the room so much more alive and balanced.
It took a week to produce the images for print, but it took a month to prepare this post up because it took that long before I got around to cleaning my room enough to hazard a photo of it. In the end, I got sick of the delay so just shoved all the clutter to the back of the room (because, you know, if it's not in frame, it doesn't exist).
The desktop backgrounds seen on the monitors in the home-office photo above are the ones that just happened to be showing when I snapped the photo. I've got them configured to cycle every so often, via images from the RSS feeds on my widescreen desktop-background photostream and my vertical desktop-background photostream. The ones showing in the photo are from this post and this post.


Did you do an actual comparison between prints of a photograph & a derivative form of that photograph?
Not with the same photo, no. My few test prints were of simple photos; when preparing stuff to actually keep, I’ve printed only derivatives so far. (It’s not my printer and so I don’t want to abuse my friend’s time… I’ll print the photo ones once I get my faux-matting stuff squared away.) —Jeffrey
What a FORMIDABLE task to try to pick out which photos to put up! I know over the years of reading your post certain shots jumped out at me and I knew immediately I would want to frame and hang them.
Frankly, I’m surprised you don’t have your work hung in every room of your home. (You can get glare-free glass, which costs more, but is worth it if you have a window reflected. It tends to blur the crispness slightly, but not to the same extent of those that you’ve already done.)
I would hope that you would turn your home into a gallery, then start on the place next door. And who know, after that??? How many apartments are there in your building anyway? 🙂
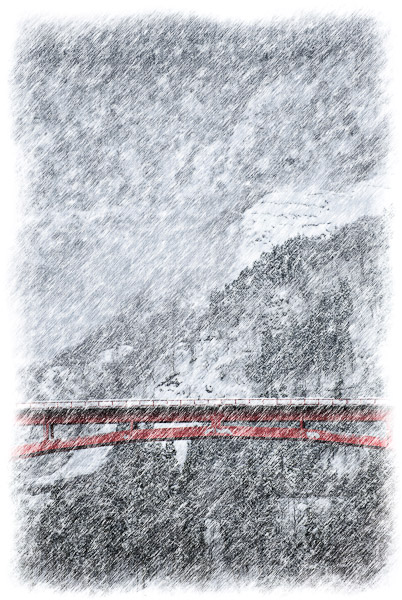
The photos you present in your blog continually show a fairly keen instinct for someone who claims to NOT be an artist; but a geek. Humbly, I advise you to ignore that instint that is telling you your photos look sterile or should be ‘hidden’ behind Corel filters. Looking at our own photos sometimes creates the same feeling as listening to yourself recorded on a tape; this feeling is worse with family shots. If you say the filters makes for a nice outcome… based on your naked, sterile, blemished photos that I’ve seen on your blog and used as my desktop backgrounds, and had coworkers inquire about… then I’ll take your word for it. But honestly, save for the bridge photo… the matte photo paper seems like embellishment enough. -maybe a quality hi-res large/medium format film border if you're feeling really crazy, but those Corel filters seem like they are diminishing; not embellishing.
Yes, that’s a tough job. Sometimes I wish I had an editor (person) that would do that work for me…
Thank you for sharing the process of making photos into print. I have similar “mental blocks” on putting my photos on the wall. I like the corel effects – it made the photos look like artwork and less likely to get boring even after you look at them day after day. Your photos look good without any effect but they are even more interesting with it. I think you just gave me an idea on how to decorate my next home:-)
Also thank you for sharing the blog. It’s interesting to read about the experience of someone living in a foreign culture.
I would concur with Ron in saying that the Corel filters detract rather than add to your photos (although I like the jogging one), which is a compliment to your photography rather than an insult to what I’m sure is a cool program.
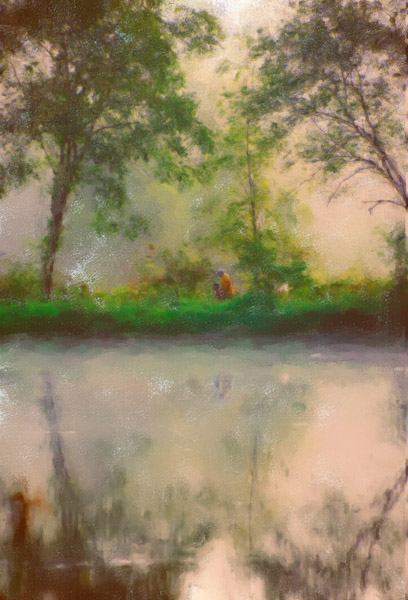
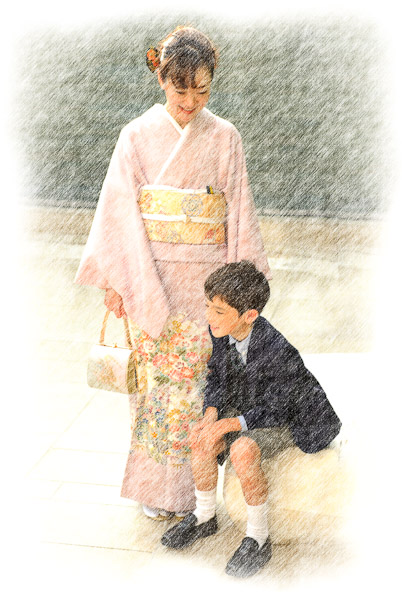
I think the point (to me) is that I would never print some of these as photos. For example, the one of Fumie and Anthony has all kinds of distracting stuff in the photo, but I could hack it out in Photoshop, knowing that the “artification” process would hide the evidence. The end result is a print that finally shows what I’ve always seen. Much the same can be said for the ballet-slipper shot. The jogging photo is just full of distracting detail in the trees and grass, but I could get rid of that with the drawing treatment. The mounted-archer shot is just a small crop from a larger frame (where a tree truck is blocking most of the rider), so as a photo printed this large it’d be very fuzzy. The silly-face Anthony and the bridge can probably go fine as straight prints (though in that case likely better with a mat). —Jeffrey
I do like your project and the results are even more interesting to learn about. And see.
I have to agree that your photos are better without the art filters. Moreover, I would go as far as to say that some of the parts you are thinking of as being distracting are actually part of what makes your pictures interesting. The one of your wife and son at the wedding in particular I think works better as a photo with the other people around about. I think you’re doing yourself a bit of a dis-service by obscuring your already wonderful art with these filters. I do understand your point about distracting details, but for me the filters themselves (with rare exceptions) are far more distracting.
I have yet to print anything substantial myself, despite having thousands of nice pictures of my son who will turn 1 a week tomorrow. But I have noticed over the past year that using photos as desktop wallpaper is an excellent way to judge whether a photo has what it takes to stand up under both near and far viewing. I find that some of the imperfections slowly begin to stand out and niggle at me, while others that I might have thought would be awful turn out actually to be quite interesting. And some things that you might forgive during everyday processing quickly turn out to be fatal flaws. Perhaps it helps that my monitors are visible from quite far away (including one in the rather large staff room at work, visible all the way from across the room).
Of course in the end you have to print the pictures and see how they work, and if you’re happy with them, that’s great. But I hope you will give yourself more credit in the future and let your pictures just speak for themselves. I don’t think you’ll be disappointed if you do.
The desktop-background thing really is a great litmus test for what appeals to you. Some of take my breath away every time they pop up, even though I’ve seen them hundreds of times. Still, that’s just one important aspect of what might make a good print. I don’t think any of the original shots on this post would even come close to making a good print, but I’m absolutely thrilled with the “artistic” versions I actually see on the wall.
In particular, the Fumie/Anthony shot (which is certainly not “art”… it’s just a snapshot taken in haste) is isolated by the artistic treatment down to the core of what I like about it…. my wife and child… but in a way that leaves the details to my imagination. Maybe that’s the root of what I like about these…. I took each shot, and I remember the situation of each, and I don’t need much more than a splash of color to bring back the memory. I produced these for myself, and presented them as such in this post, but perhaps didn’t realize at the time that their appeal was tied so closely to the specific customer (me). Maybe I’m easily impressed by my own work, but I really really like these results.
BTW, I didn’t mention it in the post, but there’s one more shot on the wall, a large (“A2”) straight-up print of this ikebana shot. It was the first test print I did; it’s okay, but I need to redo it with a well-thought-out mat, and I need to find a good A2-sized frame to replace the crappy plastic poster holder I’m using at the moment. —Jeffrey
I appreciate the PaintedLook Jogging over the camera version. I may be alone on this view, I am OK with that.
This version allows me to see the point, the two subjects front and center. The significance of the relationship.
I find myself taken into the dream experience instead of counting the blades of grass.
The look is reminiscent, by emotional feeling, of a friendly warm fond childhood cartoon.
It is however Ironic in the extreme don’t you think?
Ten thousand dollars in photo equipment
Body $3,000
Lens $2,500
Mem Card $1,000
Computer $2,000
to capture the most excellent sharp, in focus well lit full frame high res digital image in RAW to retain full detail.
Printer $2,000 cannot forget the ‘3880
$35 software to wash it all into oblivion like a wet sponge, so that it looks better printed on the wall.
ok, I exaggerate for emphasis.
Hopefully I have portrayed my point.
Toronto(area), Ontario, Canada
If I wanted oblivion, I would have just tried actually painting it myself :-). I understand the humor of your point, but another way to look at it is a way to value the skill of someone who can paint: I can’t paint, so I need all that stuff just to try to mimic the result. (FWIW, the memory card was one tenth the price you guess, but the computer and software were more.) —Jeffrey
I also really like the chalk/paint look of the jogging photo. I don’t usually like these automated artsy effects but this one works perfectly with that photo.
Do the prints coming out of this Epson look as good as photos from a typical photo processing shop?
I’ve never gotten matte printing done at a shop, so I couldn’t tell you. I’m pretty sure that these would all look horrible on glossy paper. If I were in The States and didn’t have a printer-rich friend close by, I’d give AdoramaPix a try. I had printed some wedding pics for my brother with them years ago, and was impressed with their processing system. I didn’t see the results, but my brother was happy with them. I’ve also heard good things about are the printing services associated with SmugMug and Zenfolio.
By the way, none of the effects here are totally automated. I’ll post about it in detail soon, but these all required a lot of preparation before letting Coral Painter Essentials at them, and then a lot more attention (in Photoshop and/or Lightorom) afterwords to get a look I was pleased with. I could not replicate any of them exactly the same way again were I to start from scratch. —Jeffrey
Hi Jeffrey,
I’m with those who believe that your photography is so good, the photos do not need gussying up. However, I understand the urge to try out the various “effects’ one can achieve by computer software.
While you’re at it, maybe you can try some extreme vertical crops of photos to achieve the effect of those “pillar post” prints that woodblock artists are famous for. I think it would work very well with some of your ikebana shots, and also vary the perceived widths of the artwork on the closet doors. Just my two cents worth.
Happy shooting!
Hi Jeff,
Nice pictures, I’m thinking of getting an R3000 myself once it is available. I’ll use it for fine art printing.
Btw there is a program called FotoSketcher to make pictures look like some art painting. You can see the process in progress too 🙂
Anyway, do you store all of your photos in one big catalog? Any performance hit on LR ?
For the most part I have one huge catalog (100k images) and it seems to run smoothly. I do keep a small catalog on my laptop for the most recent stuff, adding to the main catalog from time to time. —Jeffrey
Hi Jeffrey
Just wanted to share I did try a few programs like Painter and PS plugins to aid photo conversion to drawing/painting but in the end settled on Dynamic Auto Painter. It’s smaller, simpler and easier to work with.
Alexey
Jeffrey – I enjoy seeing your photos, whether “as-shot” or heavily processed with Photoshop & plug-in filters. Sometimes we have to deconstruct something to see the feelings and meaning inside. For me, that means the emotional impact of a photo might be revealed through filtering and painting. My personal favorite filters are ColorEfexPro (NikSoft), Simplify (Topaz), and Texture/Dirty Photo (Totally Rad). Regards, Tom in SF
It looks so professional. You are “too much”!