Adobe has, just one minute ago, announced the February release of Lightroom version 1.0, its digital photo workflow application. (The official name is “Adobe® Photoshop® Lightroom™” but everyone but Adobe will call it simply “Adobe Lightroom,” including me.)
Update: see my What's New in Lightroom 1.1 post.
Lightroom allows one to quickly and effectively process large numbers of digital images. I often take 500+ pictures at a single event, and Lightroom lets me quickly go through them, sorting them, hiding/deleting the bad, make small adjustments (or large adjustments — I'm still not a good photographer) in exposure, white balance, rotation, color, de-spotting, etc.
It has modules for dealing with photos as a library (sorting, editing metadata, etc.), “developing” the image (making the aforementioned adjustments), producing slideshows, web pages, and for printing. For the most part, I use only the first two.
I've mentioned Adobe's Lightroom software a number of times in the past — it's been in public beta for a year, and I've been using it since “beta 2” in the summer. The most recent public beta is “beta 4.1”, released in October, but for the last month or so, I've been privileged to be part of a small, private “beta 5” / “Release Candidate” test group, where we put Lightroom through its paces, report bugs and make product suggestions, testing and retesting with each build they release to us.
I use some of the new features in 1.0 to automate each morning's update of my bento page.
There's so much to write about Lightroom that I could write a book about it... but I won't (although many are).
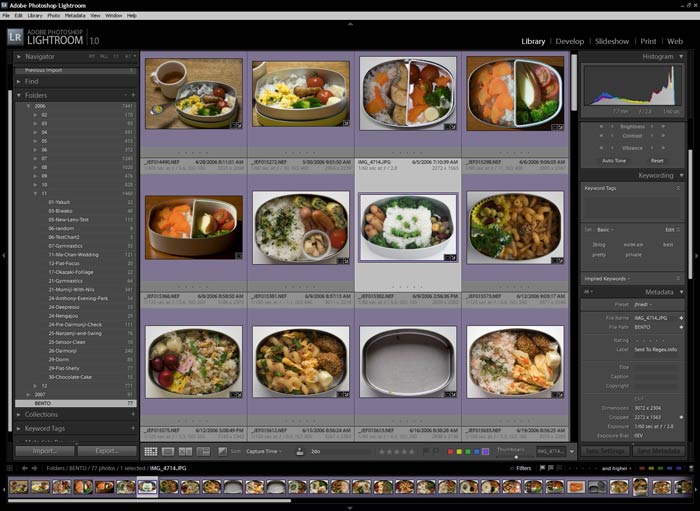
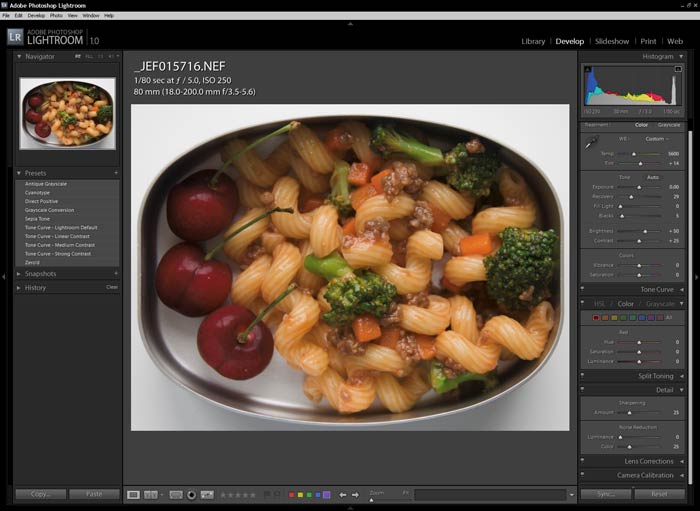
In this post, I'll just offer a few views of the two modules that I use the most — Library and Develop — to whet your appetite.
Note that all the panes around the sides/top/bottom can be hidden or shown independently.
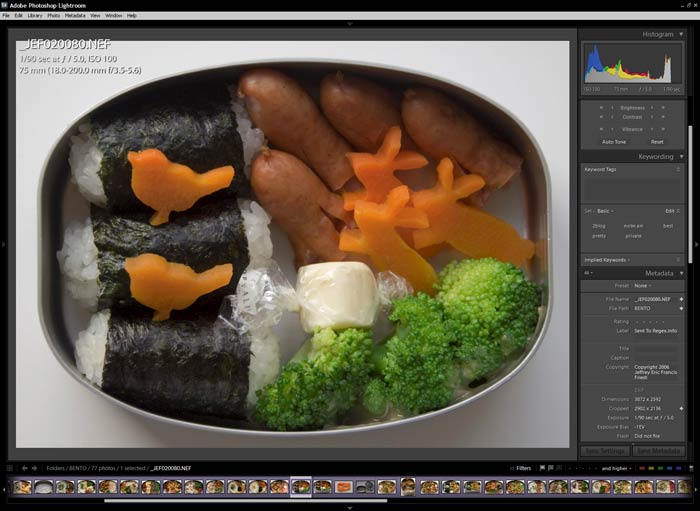
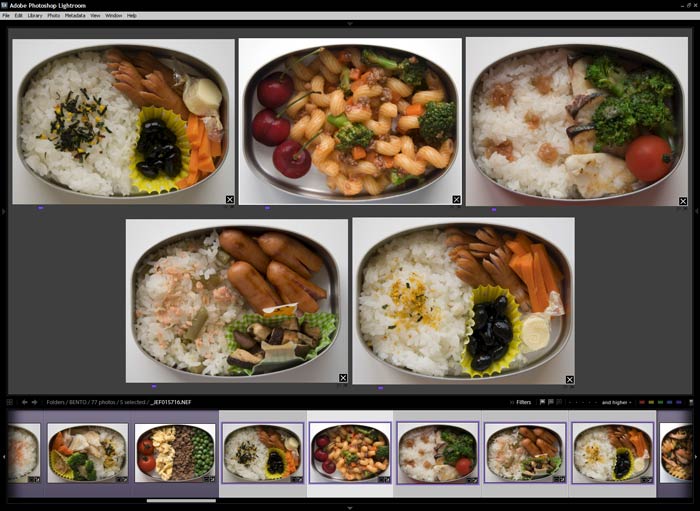
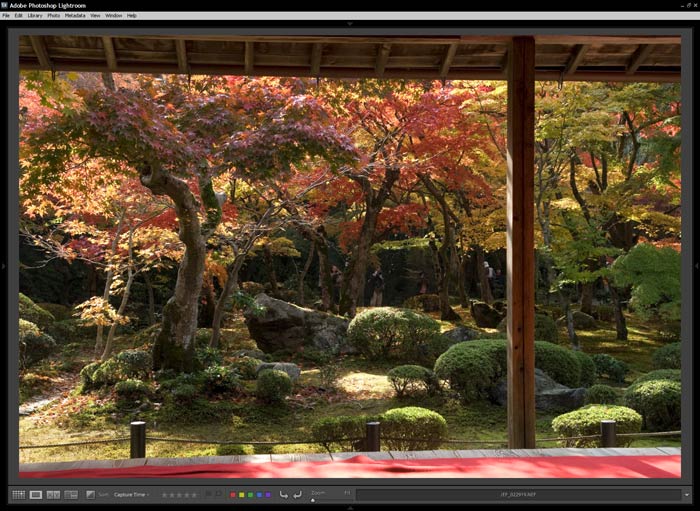
Loupe View is part of the Library Module, along with the Grid View (first pic above) and Survey View (pic below). In this screencapture, the flimstrip at the bottom is showing, as is the metadata pane at right, but the organizational pane (normally at left) is hidden, as is the module navigation pane across the top. (Both are shown in the first picture above.)
In this screenshot, all the optional panes but the filmstrip are hidden.
The Develop module allows you to adjust a bunch of things, including white balance/tint, many exposure settings (color intensity, brightness, contrast, etc.), enter grayscale mode, apply sharpening, apply noise reduction (separate adjustments for color vs. luminance), correct chromatic aberration, correct for lens vignetting, use a Photoshop-esque clone tool and healing tool, fix red-eye, and rotate and crop the image.
What's really cool is that all the controls are the same whether the input is a raw file, a JPG, a TIFF, or a Photoshop PSD file.
There are so many things new from the previous public beta, I don't know where to start. Just the main ones from the Library and Develop module that I can think of off the top of my head:
- Clone/Healing/Red-eye tools
- Virtual copies (allows multiple adjustments/crops/etc for the same image)
- Image stacks
- Two new ways to rate photos besides the current 0-5 star system: flags (“picked”, “rejected”, “no flag”) and colors (an image can have one of five color tags associated with it).
- Lots of keyword-related tools, including a keyword stamper and keyword browser
- Intuitive folder-oriented layout replaces the “shoots” layout.
- Export presets (yeah!)
- Many editable presets (for filenames, metadata, export settings...)
- Can import/export Photoshop PSD files
- A “watched folder” — images showing up in the folder are automatically imported.
My Tech-Related Photography Posts
- My Lightroom-to-iPad Workflow
- Lightroom Goodies (lots of plugins)
- Digital Image Color Spaces
- Online Exif (Image Data) Viewer
- Jeffrey's Autofocus Test Chart
- Photoshop Calendar-Template-Building Script
- How to Prepare Photos for an iPad
- A Qualitative Analysis of NEF Compression
- Tripod Stability Tests
more...
There are a bajillion more, but I've forgotten much of what Beta 4 was like, and I wanted to get this post out now that Lightroom has been officially announced and I'm no longer bound by the NDA in discussing its features. I was out this morning and didn't see the heads-up about today's announcement until just an hour ago, so this was the best I could put together in that time.
I'm very excited.... Lightroom is really great news for all digital photographers.
I have a page of Lightroom 1.x Resources for links to tidbits and detailed information.
I’ve been using Apple Aperture for the last few weeks and I have found that really useful. I’m sure this is the windows replica of the same thing. Would you know if the IPTC tags that are used in/by Aperture is compatable with Lightroom?
Me along with bunch of my wildlife friends have been putting our pics together.. but tagging them etc.. AFAIK, Aperture puts all that into in IPTC field. Not sure what lightroom does.
Hi Kalyan,
IPTC stuff is all standard, as far as I know, but you can try this test image. I entered “this is….” and the label for all fields I could. (Some fields, such as the Create Date, didn’t allow free-format input).
For a quick look at what’s in there, you might also see the test image via my Exif viewer. Searching for “this is” on the page will lead you to everything I could edit.
Let me know what you find out.
The field names and formats are almost same (atleast in the IPTC section) on Aperture and Lightroom. So I can now work with another friend of mine who uses aperture to save standard tagging of images among ourselves.
Now I wonder how long it will take before Canon and Nikon start supporting the DNG format. 🙂
Great site mate!!!
Avast Jeffrey , Beta Buddie! Love the Bento take on LR. I just cross linked you with my Blog.
Take care, mehearty!
Don
Jeffrey (Sean?)
Just wanted to let you know there is a woman in nashville, tn usa who will forever be grateful to you and your generosity in sharing info.
i have been shooting for years (mainly children’s port), dig since 12/07. although the camera transition has been easy (nikon n-series to nikon d-series), the editing and postproduction have been quite challenging. then add hardware problems, calibration probs, eeeeeeeek. memory probs, space probs… compatibility probs… ignorance.
i was editing in elements 3 (eek) tugging on tabs and clicking on arrows, weepingly watching my children’s skin gamut from copper to green and finding home in magenta. all my little kids looked like they had either just experimented with mom’s expired self-tanner, or had just been resuscitated from an unfortunate debacle involving an ice pond.
in the meantime, i have one project of 80ish little green portraits overdue, and one of about 20 little blue children. (intermittently disbursed therein are a few sun worshippers.) in my ignorance, my attempted solution was to tweak, go to lab proof, go home tweak, go to lab proof, ad nauseam.
then i calibrated, loaded printer profiles, tweaked and proofed a few more times. i had opened and closed and changed and saved my pix so many times, i now had 100’s of pictures of little green and purple coppertone children, their faces muddy and pocked, with jagged little edges. All of which had been prepaid for…
desperate and overwhelmed, on the verge of collapse, i was online researching for about 6 hours two nites ago, desperately seeking ideas about skin tone in color correction. stumbled upon lightroom… read lots of info about the vast capabilities… and learning curves involved. Got lightroom. Found your website. Loaded your presets.
Of all the mistakes and ignorance and problems that have plagued me, miraculously, I had kept my original tiffs and they were pristine in their master file. Last nite, I finished 40 portrait edits, the children have skin colored skin in all their unique dimensions. As these portraits were shot in natural lite (w/ and w/o strobe and speedlite), I was able to utilize many of your presets in diff ways. Thanks to you, I will be able to deliver beautiful jobs a little late, as opposed to ugly jobs very late, so, thank you. Thank you. You have impacted my business in a positive and generous manner.
This is the longest (if not only?) letter I have ever written stranger(s), but I wanted to express my sincere gratitude for you compiling and sharing the presets. I’m intrigued by the type person that would create and compile masterpiece recipes and willingly share it with strangers.
I would like to contribute as well and I am working on a preset for “recently-thawed sun-burned children”, and will forward it when it’s perfected.
Most sincerely,
Reese